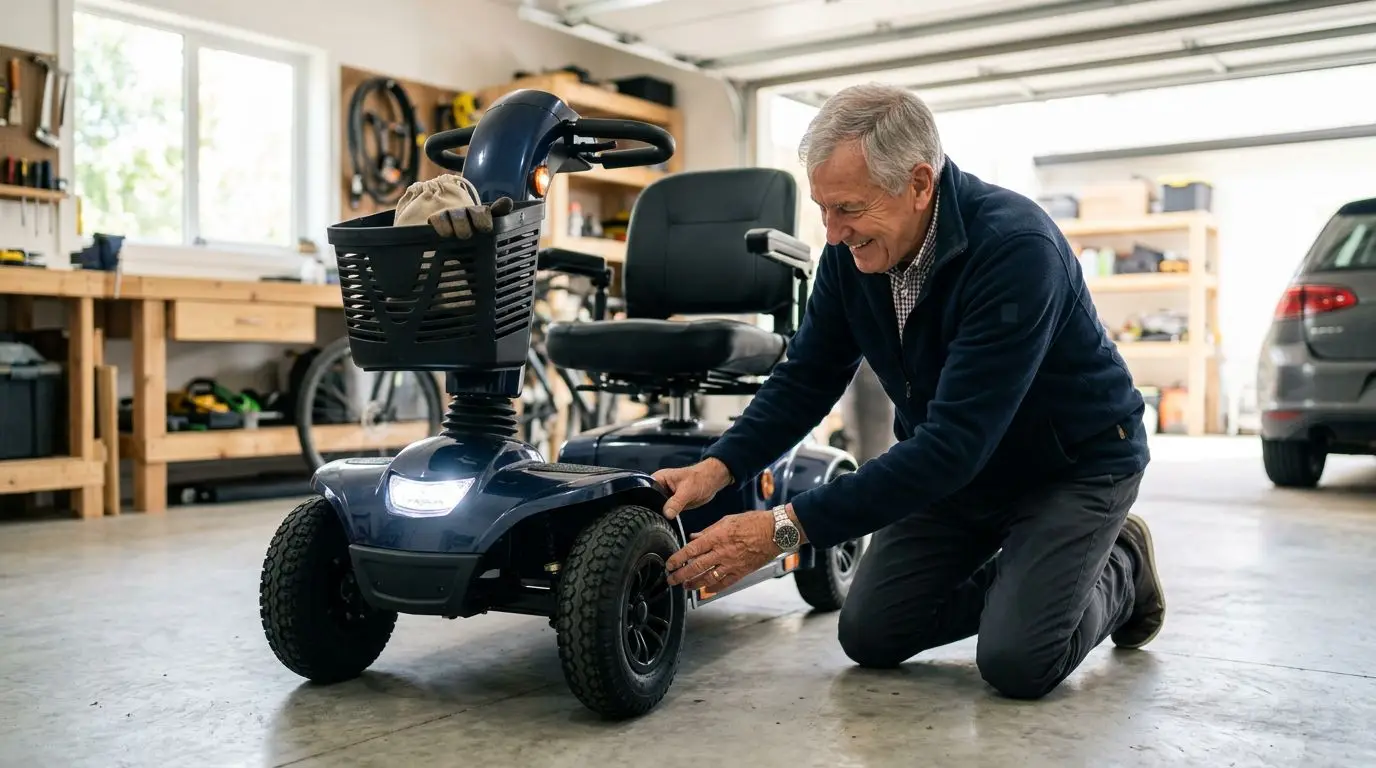
A safe mobility scooter ride starts with a quick check of the parts most likely to affect control: tires, battery, brakes, lights, controls, and anything that can come loose. Before each trip, spend 2 to 5 minutes confirming the scooter rolls straight, stops properly, has enough charge for the route, and has no loose basket, seat, tiller, or armrest parts that could shift while you are moving.
This checklist is not a repair guide. It is a practical pre-ride routine that helps you decide whether the scooter is ready to use, whether the trip should be shortened, or whether the scooter should stay parked until a caregiver, technician, or dealer can inspect it.
The 2-minute pre-ride scan: what to check before every trip
A useful scooter safety check should be short enough that you will actually do it. For most riders, the daily version takes about 2 minutes indoors and another 30 to 60 seconds outside if you are checking lights, ramps, or sidewalks.
Start with the scooter powered off. Walk around it once, looking low first and then high. Check the tires or wheels, battery indicator, brake response, lights, horn, seat position, tiller angle, basket, cane holder if used, and any bags or loose items. Then power on and do a slow test roll before entering a sidewalk, store aisle, parking lot, or driveway.
| Checkpoint | What to do | Safe go/no-go clue |
|---|---|---|
| Tires or wheels | Look for low pressure, cracks, wobble, debris, or flat spots. | Do not ride if a tire is flat, separating, or rubbing. |
| Battery | Confirm the charge indicator is adequate for the planned distance. | Shorten the trip if the display is near half or dropping quickly. |
| Brakes | Test stop at very low speed within the first few feet. | Do not ride if stopping feels delayed, jerky, or inconsistent. |
| Lights and horn | Turn on lights and press the horn once. | Use extra caution or avoid low-light travel if lights do not work. |
| Loose parts | Check seat lock, tiller knob, basket, armrests, and accessories. | Do not ride with anything that shifts, drags, or blocks steering. |
Keep the routine consistent. Use the same order every time. That makes it easier to notice when something feels different.
Tires and wheels: a 30-second stability check
Tires affect steering, braking distance, comfort, and whether the scooter tracks straight. Give them at least 30 seconds before every ride, especially if you will be crossing curb cuts, brick walkways, uneven pavement, grass edges, or parking lots.
If your scooter has pneumatic tires, check that they are not visibly low and confirm pressure with a gauge when needed. Use the pressure range printed on the tire sidewall or in the owner’s manual; do not guess. A tire can look acceptable while being 5 to 10 psi low, which can make the scooter feel sluggish, pull to one side, or reduce range.
If your scooter has solid or foam-filled tires, you do not need air pressure, but you still need to inspect them. Look for splits, missing chunks, deep cuts, or flat spots. A crack wider than about 1/8 inch, a tire that has separated from the rim, or a wheel that wobbles as it turns is a no-ride condition.
- Remove small stones, string, leaves, or plastic caught near the wheel or axle.
- Look for rubbing between the tire and frame or fender.
- Check that anti-tip wheels, if equipped, are not bent or hanging loose.
- Roll forward slowly and listen for scraping, clicking, or thumping.
Do not use the pre-ride check to patch a tire or diagnose a bearing. The goal is simpler: decide whether the scooter is stable enough to operate safely today.
Battery and controls: plan around the 50% point
The battery check is not just about whether the scooter turns on. It is about whether you can complete the ride, handle small detours, and return home without trying to stretch the last bar on the display. As a practical rule, avoid starting longer outdoor trips with the battery near 50% unless you have a short, familiar route and a charging plan.
Before leaving, turn the scooter on and watch the battery indicator for a few seconds. Some displays settle after power-up, so a quick glance may be misleading. If the meter drops rapidly after moving a short distance, treat that as a warning sign and reduce the trip.
Test the controls while stationary or at the slowest speed setting. The throttle should return to neutral when released. The speed dial should not spin loosely. The key, power switch, or control panel should not flicker when touched lightly.
- Confirm the charger is disconnected before driving away.
- Make sure the charging port cover is closed if the scooter has one.
- Keep heavy bags away from the throttle and control panel.
- Use a lower speed setting for the first 10 to 20 feet after startup.
Battery indicators are estimates, not fuel gauges. Hills, rider weight, cold weather, soft tires, and rough surfaces can all reduce range. A ride that is easy in a store may use more power on a sloped sidewalk or into a stiff wind.
Brakes and freewheel lever: test stopping in the first 3 feet
Every ride should begin with a low-speed brake check. Move forward slowly and release the throttle to confirm the scooter slows and stops within the first few feet. A 3-foot test in a clear indoor area or driveway can reveal problems before you reach a ramp, curb cut, or crowded doorway.
Many mobility scooters use automatic electromagnetic braking, which engages when the throttle is released. Some also have a manual brake or parking brake. Whatever your scooter uses, stopping should feel predictable. If the scooter continues rolling after you release the control, surges, shudders, or only stops after a delay, do not ride it.
Check the freewheel lever before every trip. This lever allows the scooter to be pushed manually when powered off, but it must be in drive mode for normal operation. If it is left in freewheel, the scooter may roll unexpectedly and powered braking may not work as expected.
- Freewheel lever fully in drive position.
- No warning beeps or brake fault lights after startup.
- Scooter stops smoothly when the throttle is released.
- Parking brake, if equipped, holds on a mild slope before you ride away.
Never test brakes at full speed. Start slow. If the scooter fails a gentle brake test, that is enough information to stop the ride and ask for help.
Lights, horn, and reflectors: a 10-second visibility check
Lights and signals matter even during daytime rides. A shaded garage, a cloudy afternoon, a store entrance, or a parking lot can make a scooter harder to see. Spend 10 seconds checking the headlight, rear light, reflectors, turn indicators if equipped, and horn.
Turn the lights on and walk to the front and rear if you can do so safely. If walking around is difficult, park facing a wall or garage door and look for the beam and reflection. For the rear light, use a mirror or window reflection, or ask another person to confirm it works.
The horn should be loud enough to alert someone a few yards away in a hallway or store aisle. It is not a substitute for slowing down, but it helps when a pedestrian steps backward, a shopper turns a cart suddenly, or a driveway has limited sight lines.
| Feature | Quick test | Why it matters |
|---|---|---|
| Headlight | Turn on and confirm a steady beam. | Helps others notice you in shade, dusk, and indoor transitions. |
| Rear light | Check by reflection or helper. | Improves visibility from behind on sidewalks and lots. |
| Turn signals | Activate left and right if equipped. | Useful near driveways, crossings, and shared paths. |
| Reflectors | Look for dirt, cracks, or missing pieces. | Passive visibility when light hits the scooter. |
| Horn | Press once before leaving. | Warns people nearby without needing to shout. |
If you expect to ride after sunset, check local rules and use extra caution. Mobility scooters are not designed like cars, and being technically visible is not the same as being easy for drivers to see.
Loose parts and seating: use the 1-inch wiggle rule
Loose parts can become safety problems quickly. A basket that shifts into the tiller, an armrest that drops, or a seat that is not locked can distract you at the worst moment. Use a simple 1-inch wiggle rule: if a part moves more than about an inch when it should be locked in place, stop and correct it before riding.
Check the seat first. It should be fully seated on the post and locked in the forward-facing riding position. Swivel seats are convenient for transfers, but they must click back into position before the scooter moves. If the seat rocks, rotates unexpectedly, or feels higher on one side, do not ride.
Next, check the tiller. The tiller adjustment knob or latch should be tight enough that the steering column does not drop toward you or away from you while driving. A loose tiller can affect steering control and may also pull on cables.
- Lift gently on the basket and confirm it is attached.
- Fold armrests down and make sure they stay in place.
- Secure oxygen holders, cane holders, walkers, cup holders, and rear baskets.
- Keep bags from hanging near wheels, throttle controls, or brake levers.
- Confirm floorboard items cannot slide under your feet.
Loose does not always mean broken. Sometimes a latch was not fully engaged after transport or charging. The pre-ride check catches that before movement turns it into a hazard.
How to choose checks by scooter type and route
Not every scooter needs the exact same emphasis. A compact travel scooter used inside a grocery store faces different risks than a larger outdoor scooter traveling 2 miles over sidewalk joints and driveway slopes. Match the checklist to the scooter type and where you plan to ride.
| Scooter type or route | Extra pre-ride focus | Example safety reason |
|---|---|---|
| 3-wheel scooter | Steering, speed setting, and turning space. | Sharper turning can feel less stable on uneven surfaces. |
| 4-wheel scooter | Tire condition, turning clearance, and brake test. | Often more stable, but may need more room in tight spaces. |
| Folding or travel scooter | Frame latches, seat post, battery connection, and tiller lock. | Parts are handled more often during transport. |
| Outdoor or higher-capacity scooter | Lights, horn, tire pressure, and loose accessories. | Longer trips and higher speeds raise the cost of small problems. |
| Indoor-only route | Speed dial, horn, basket clearance, and floorboard clutter. | Aisles, elevators, and doorways leave little recovery room. |
| Sidewalk or neighborhood route | Battery reserve, brakes, lights, tires, and weather. | Curb cuts, cracks, and slopes demand more control. |
Route matters as much as scooter type. If your trip includes a ramp, test braking before the ramp. If it includes a rough sidewalk, inspect tires more carefully. If it includes a street crossing, check visibility and choose a conservative speed setting before you leave.
How to measure your own checklist time and setup
A checklist works best when it fits your routine. Try timing yourself for 7 days. Most riders can build a reliable habit that takes less than 5 minutes, including the slow test roll.
Set up a pre-ride station near the place you store the scooter. Good lighting helps. A small flashlight, tire gauge for pneumatic tires, clean cloth, and printed checklist can stay nearby. If you charge in a garage, keep the walkway clear enough to move around the scooter without stepping over the cord.
Measure your route, too. You do not need exact engineering data, but you should know the basics: how far you plan to go, whether there are slopes, where curb cuts are located, and where you can safely turn around. A trip of 0.5 mile on smooth indoor flooring is not the same as 0.5 mile outdoors with cracked pavement and wind.
- Write down your common destinations and typical ride time.
- Note whether the battery returns with 3 bars, 2 bars, or less.
- Mark problem spots such as steep driveways, narrow doors, or rough curb cuts.
- Keep emergency contact information with you, not only in your phone.
- Recheck the scooter after transport in a vehicle, even if you checked it earlier.
If you use a caregiver or family member for support, agree on the checklist language. “Battery, brakes, tires, lights, loose parts” is easy to remember and easy to repeat.
Who this checklist is best for—and when to stop and get help
This checklist is best for everyday riders, caregivers, senior living staff, and family members who want a practical way to connect simple maintenance awareness with safe operation. It is especially useful before trips longer than 10 minutes, after the scooter has been transported, after several days without use, or before riding in low light.
It is also helpful for new riders. A scooter may feel easy to operate after a few minutes, but safe use depends on repeatable habits: starting slowly, checking surroundings, avoiding sudden turns, and knowing when the scooter does not feel normal.
Stop and get help if you notice any of these conditions:
- The scooter does not stop reliably during a low-speed test.
- A tire is flat, badly cracked, separated, or rubbing.
- The battery indicator drops sharply within the first few minutes.
- The seat, tiller, or wheel assembly feels loose.
- You hear grinding, scraping, popping, or repeated fault beeps.
- Lights fail and your route includes dusk, dark areas, or traffic crossings.
Do not rely on a mobility scooter to compensate for dizziness, sudden weakness, vision changes, or medication side effects. If your health status changes, talk with a qualified medical professional about safe mobility options. The scooter can support independence, but it still requires alert driving and sound judgment.
Pre-ride safety FAQ: 5 common questions
Should I check my mobility scooter before every ride?
Yes. A short check before every ride is the safest habit because many problems are simple but easy to miss, such as a charger still plugged in, a basket not attached, a low tire, or a freewheel lever left in the wrong position. The daily version can take about 2 minutes.
What is the most important safety check?
The brake check is the most important single test because stopping control affects every ride. Test at very low speed in the first 3 feet, before you approach a ramp, doorway, sidewalk, or parking lot.
Can I ride if one light is not working?
It depends on the route and lighting, but it is safest to avoid low-light travel when a headlight, rear light, or reflector is not working. If you are riding indoors in good lighting, use caution and arrange repair before the next outdoor or evening trip.
How much battery should I have before leaving home?
For short, familiar trips, follow your scooter’s manual and your normal usage pattern. For longer outdoor rides, try to start with a full charge and avoid leaving with the display near 50%, especially if the route includes hills, rough pavement, or cold weather.
What should I do if the scooter feels different but still moves?
Stop in a safe place and inspect it before continuing. A scooter that pulls, hesitates, scrapes, wobbles, or stops differently than usual should not be ignored just because it still powers on.
Frequently asked questions
Should I check my mobility scooter before every ride? +
Yes. A quick 2-minute check before each ride helps catch low tires, loose parts, weak battery charge, brake issues, or lights that are not working.
What is the most important pre-ride scooter safety check? +
The brake test is the most important single check. Move slowly and confirm the scooter stops predictably within the first few feet before entering a ramp, sidewalk, doorway, or parking lot.
Can I ride with a mobility scooter light out? +
Avoid low-light or outdoor travel if a headlight, rear light, or reflector is not working. In a well-lit indoor area, ride cautiously and arrange service before your next outdoor trip.
How much battery should I have before a scooter ride? +
For longer outdoor trips, it is best to start with a full charge and avoid leaving when the indicator is near 50%. Hills, cold weather, rider weight, and rough surfaces can reduce range.
What should I do if my scooter feels different than usual? +
Stop in a safe place and inspect it. If it pulls, wobbles, scrapes, hesitates, or stops differently, do not continue until the cause is understood or a qualified person checks it.
Related guides

First-Time Mobility Scooter Safety Checklist for Seniors, Caregivers, and New Riders
13 min read
Mobility Scooter Maintenance Schedule: Weekly, Monthly, and Trip Checks
16 min read
How to Choose a Mobility Scooter: A Practical Buying Guide for Seniors and Adults
13 min read