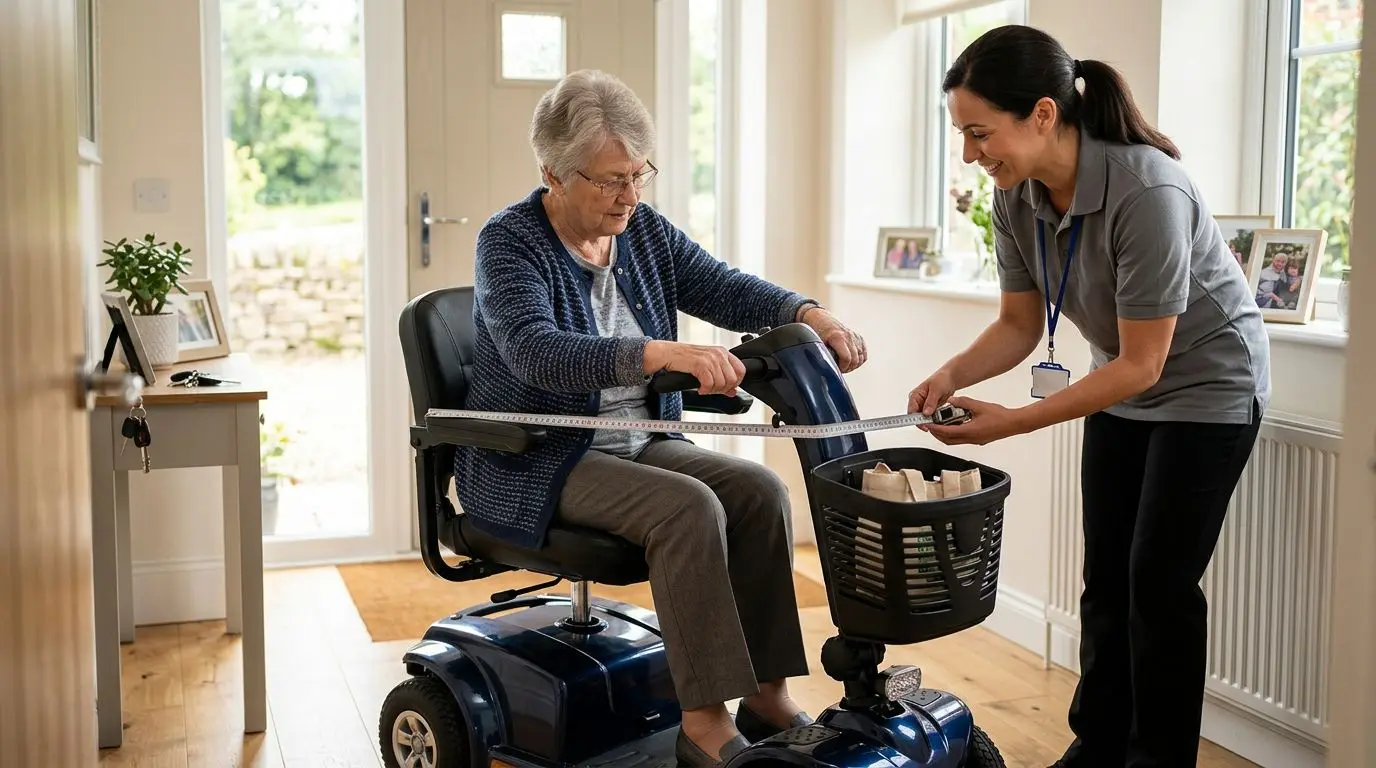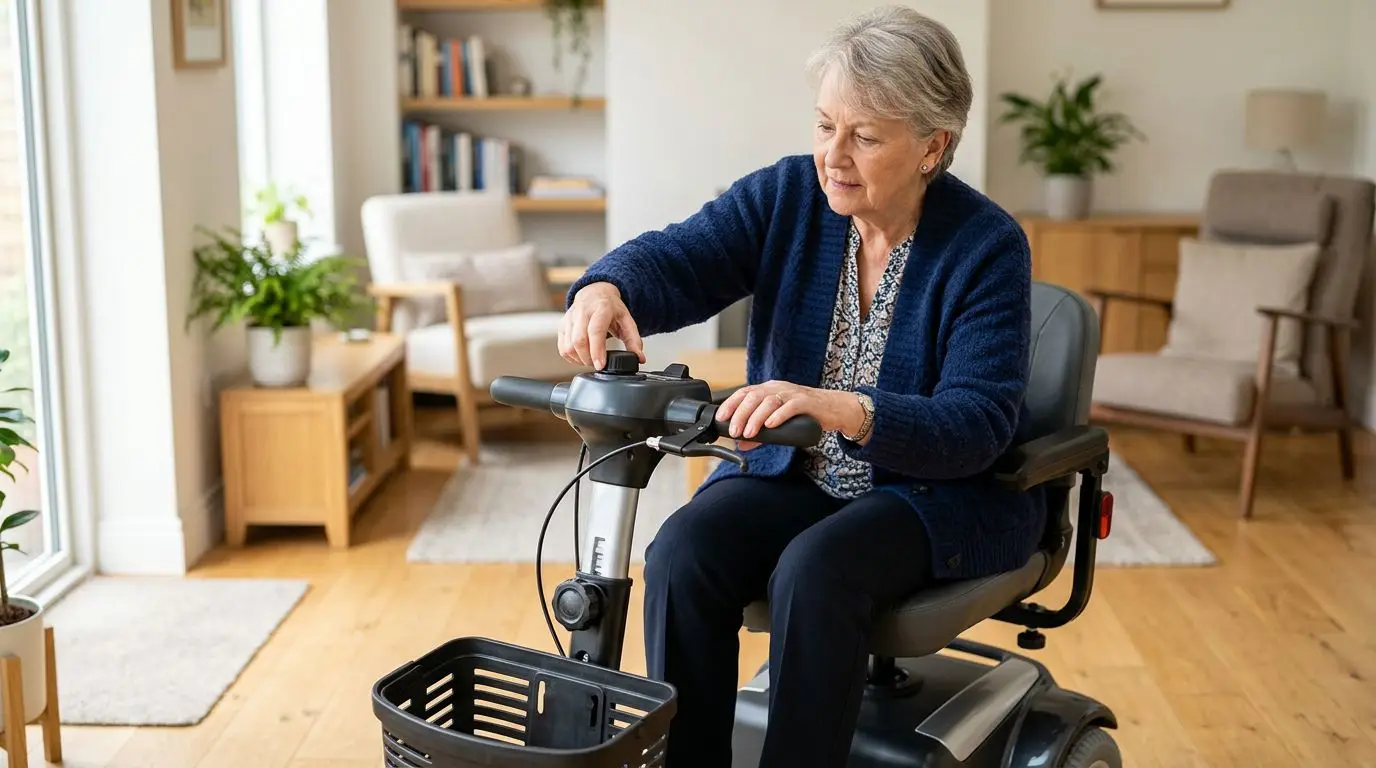
The best mobility scooter control setup for arthritis, weak grip, or limited reach is one you can use with relaxed shoulders, a neutral wrist, and light, repeatable finger or thumb movement. Before choosing a scooter, check tiller adjustability, throttle style, steering effort, brake access, and whether you can reach the speed control without leaning forward.
A good fit should still feel comfortable after more than a quick 30-second sit. If possible, test it for at least 10 to 15 minutes, because hand fatigue, wrist angle, and shoulder strain often appear after a few turns, stops, and starts.
Why Tiller Fit Matters After 10 Minutes of Driving
The tiller is the upright steering column that holds the handlebars, throttle, speed control, horn, and often the key switch, battery gauge, and light controls. If the tiller sits too far away, you may have to reach with straight arms. If it sits too close, your wrists can bend sharply or your knees may feel crowded.
For many riders, the best position keeps the elbows slightly bent, often around 90 to 120 degrees, with the shoulders down and relaxed. Your hands should rest on the grips without hard squeezing. You should be able to steer left and right while keeping your back against the seat.
This is especially important for people with hand arthritis, reduced grip strength, shoulder pain, tremor, neuropathy, or limited range of motion. A scooter that feels fine on a showroom floor for 2 minutes may become tiring during a 20-minute grocery trip or a long walk from a parking lot to a medical office.
Do not judge fit by seat comfort alone. The controls determine how often you must pinch, twist, stretch, or hold tension in your hand. Those small movements add up.
Control Types Compared: 4 Common Throttle Setups
Most mobility scooters use hand-operated throttles rather than foot pedals. The exact feel can vary, but the basic goal is simple: press or move the control to go, then release it to stop. Many scooters use an automatic electromagnetic brake that engages when you release the throttle.
For someone with arthritis or weak grip, the easiest throttle is usually the one that requires the least force and the least awkward wrist movement. That will not be the same for everyone. A rider with thumb pain may prefer finger operation, while someone with finger stiffness may prefer a larger paddle they can press with the thumb or side of the hand.
| Control type | How it works | Often helpful for | Watch out for |
|---|---|---|---|
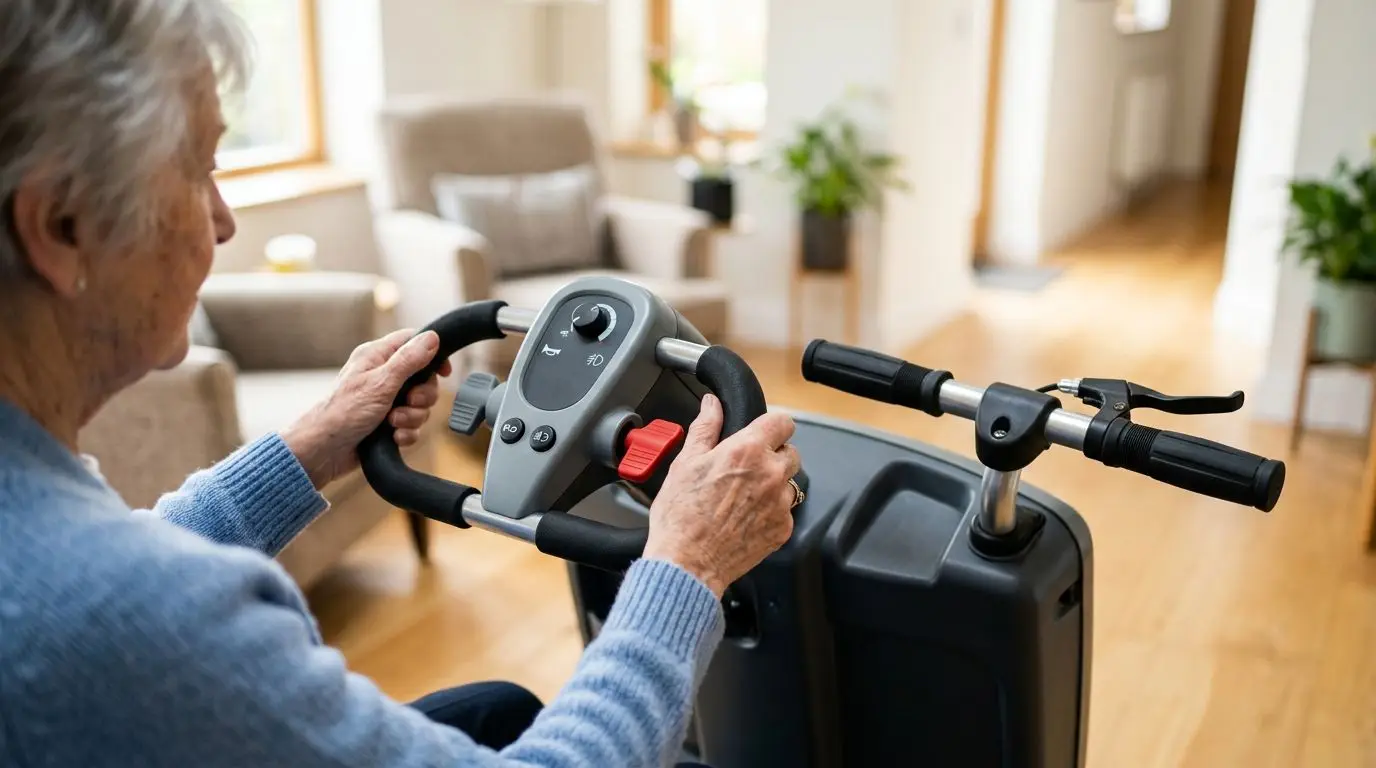
| Delta tiller with wraparound handles | Hands can rest on a loop-shaped handle; throttle paddles are often near the thumbs or fingers | Weak grip, one-handed steering, limited wrist motion | Check knee and belly clearance when the tiller is pulled close |
| Thumb paddle throttle | Press a paddle with the thumb to move forward or reverse | Riders with good thumb comfort and limited finger strength | Can bother painful thumb joints during longer trips |
| Finger pull throttle | Pull or squeeze a lever-style control with one or more fingers | Riders whose thumbs are painful but fingers remain flexible | May feel tiring if it requires constant pressure |
| Twist-style control | Rotate part of the handle, similar to a small twist grip | Some riders with strong wrists and familiar riding habits | Can be difficult with wrist arthritis, tremor, or reduced grip |
Many scooters allow either right-hand or left-hand use of the throttle function, but not every control is equally convenient from both sides. If one hand is stronger, test starts, stops, turns, and reverse with that hand before you decide.
How to Measure Reach and Tiller Angle in 6 Steps
You do not need special tools to check tiller reach. A tape measure helps, but posture is the most important guide. Wear the shoes and any hand brace, glove, or wrist support you normally use, because even a 1/4-inch brace can change how your hand lands on the grip.
- Sit all the way back. Your lower back should touch the seatback if that is how you normally ride. Do not scoot forward just to reach the controls.
- Place both feet where they belong. Keep your feet on the scooter deck or footrests. If your knees hit the tiller, you need a different adjustment or a roomier layout.
- Bring the tiller toward you. If it adjusts, set it so your elbows remain bent rather than locked. A common comfort range is about 90 to 120 degrees at the elbow.
- Check wrist position. Your wrists should be close to straight, not sharply bent up, down, or sideways. Neutral wrist posture is usually easier on sore joints.
- Turn fully left and right. You should be able to steer without leaning your torso or lifting your shoulder. Try both slow and tighter turns.
- Leave clearance. Aim for at least 2 to 3 inches between the tiller and your body when seated comfortably, if the scooter layout allows it.
If you cannot reach the throttle without leaning forward, the scooter is not a good control fit in that seat position. Leaning forward may seem manageable in a store, but outdoors it can reduce stability and increase fatigue.
Arthritis and Weak Grip: 8 Features Worth Checking
Hand comfort is not only about the throttle. The whole control area should reduce squeezing, pinching, and repeated twisting. The goal is smooth operation with the least strain you can reasonably get.
- Delta or wraparound tiller: This shape can let you steer with a relaxed palm or partial grip instead of wrapping your fingers tightly around a bar.
- Large throttle paddles: A larger surface spreads pressure across the thumb or fingers. Small tabs can create painful pressure points.
- Light throttle resistance: You should not have to press hard. Try holding the throttle steadily for 30 seconds, then release and repeat several times.
- Left-hand and right-hand usability: If one side is painful, confirm you can operate forward, reverse, horn, and speed settings with your stronger hand.
- Simple speed dial: A large dial or clear buttons are easier than tiny recessed controls. You should be able to adjust speed without looking down for more than a second.
- Readable display: Battery and speed indicators should be visible in daylight. High contrast markings help if eyesight is reduced.
- Easy key access: A key that requires a tight pinch or awkward twist can be frustrating. Test it 3 times.
- Minimal vibration at the hands: Rough surfaces can worsen discomfort. Pneumatic-style tires, suspension, or padded grips may help, depending on the scooter type.
One practical test is to operate every control while wearing the thickest gloves you expect to use. If you live where winter gloves are common for 3 to 5 months a year, tiny buttons and closely spaced switches may become a real problem.
Limited Reach: What to Check Within 2 Inches
Limited reach can come from shoulder stiffness, short arm length, posture changes, kyphosis, back pain, or a seat that positions you too far from the tiller. Small differences matter. Moving the seat or tiller by just 1 to 2 inches can change whether the scooter feels easy or exhausting.
Start by checking whether the tiller adjusts forward and back, and whether it locks firmly. Some tillers tilt through several positions; others have a smaller adjustment range. If the tiller only works when pulled very close, make sure it does not crowd your knees during turns.
Seat position also affects reach. A sliding seat can help shorter riders or people with limited shoulder motion. A swivel seat can make transfers easier, but it should lock securely before driving. Armrests should not block your elbows from moving naturally.
If your reach is limited on one side, test one-handed steering carefully in a safe area. Many delta tillers are easier to guide with one hand than straight handlebars, but steering one-handed still requires attention, especially on slopes, curb cuts, or uneven pavement.
Braking and Speed Controls: Test Stops From 10 Feet
Most mobility scooters use automatic braking: when you release the throttle, the motor slows and an electromagnetic brake holds the scooter. This can be very helpful for riders who cannot squeeze a hand brake. The stop should still feel predictable, not jerky.
In a test area, drive slowly in a straight line and release the throttle from about 10 feet before a marked point. Repeat at low, medium, and your expected normal speed. You are checking whether the scooter stops smoothly and whether your hand can release the throttle quickly and fully.
If a scooter has a manual brake lever, parking brake, or freewheel lever, make sure you understand what each control does. A freewheel lever is commonly used so the scooter can be pushed manually when powered off, but it must be returned to drive mode before riding. The lever should be reachable by the person who will actually use it, or by a caregiver if that is part of the plan.
Speed controls deserve the same attention. A maximum speed dial is useful because it lets you limit the scooter before entering tight indoor spaces. For example, a rider may use a low setting inside a clinic hallway and a higher setting on a long, open sidewalk. The control should be easy to see and adjust without accidental bumps.
Feature Comparison: What Helps Hands, Wrists, and Shoulders Most
The right scooter is a combination of features, not one magic control. A rider with severe thumb pain might care most about throttle shape, while a rider with shoulder stiffness may need a closer tiller and rotating seat. Use the table below to connect common needs with the features most likely to matter.
| Need or limitation | Helpful feature | Fit test | Red flag |
|---|---|---|---|
| Thumb arthritis | Finger-operated throttle option or broad paddle | Drive for 10 minutes without thumb aching | Sharp thumb pressure or pinching |
| Weak grip | Delta tiller, light-touch throttle, automatic braking | Steer with relaxed hands, not clenched fists | Needing to squeeze to stay in control |
| Limited shoulder reach | Adjustable tiller and sliding seat | Back stays against seat during turns | Leaning forward to reach throttle |
| Wrist stiffness | Neutral grip angle, large controls, no twist grip | Wrists remain straight during starts and stops | Wrist bends sideways to steer |
| Reduced vision | High-contrast battery gauge and large speed markings | Read display at arm's length in daylight | Tiny symbols or low-contrast labels |
| Occasional one-hand use | Wraparound tiller and reachable controls on both sides | Turn slowly both directions with stronger hand | Horn or reverse unreachable from one side |
When comparing scooters, write down what feels easy and what feels painful. A simple 1 to 5 comfort score for throttle, steering, braking, and display visibility can make choices clearer after you have tried more than one scooter.
Who This Fit Advice Is Best For: 5 Common Rider Profiles
This control-fit checklist is especially useful for riders who can sit upright and operate a scooter safely but need the hand controls to be less demanding. It is not a substitute for medical advice, driving assessment, or occupational therapy guidance when those are needed.
- People with hand arthritis: Look for larger contact surfaces, neutral wrist posture, and low-effort controls.
- People with weak grip: Prioritize a tiller you can guide without squeezing and a throttle that does not require constant forceful pressure.
- People with limited shoulder range: Focus on tiller angle, sliding seat position, and whether you can steer without reaching forward.
- People with one stronger hand: Confirm all everyday controls can be reached and used from the stronger side.
- Caregivers helping with selection: Watch posture during a 10- to 15-minute trial, not just whether the rider can make the scooter move.
If the rider has delayed reaction time, severe vision loss, uncontrolled dizziness, or difficulty understanding controls, get professional guidance before using a scooter in public spaces. Safety comes first.
Indoor vs Outdoor Control Fit: Try a 36-Inch Turn Area
Controls can feel different indoors than outdoors. Indoors, the challenge is usually tight steering around doorways, furniture, elevators, and checkout lanes. Outdoors, the challenge becomes vibration, slopes, curb cuts, longer distances, and changing light.
If the scooter will be used at home, measure the narrowest doorway and hallway turns. Many interior doorways are about 30 to 36 inches wide, though older homes may vary. A scooter that requires wide arm movement or makes you lean during turns may be frustrating in tight spaces.
For outdoor use, pay attention to how your hands feel on uneven pavement. Even small vibration through the tiller can irritate sore hands over a 15- or 20-minute ride. Also check whether the speed control can be lowered easily before entering crowded areas or turning into a ramp.
Do not assume the smallest scooter is always easiest. Compact scooters may fit better in tight areas, but some have smaller controls or less tiller adjustment. Larger scooters may offer a roomier cockpit and steadier feel, but they may need more turning space.
A 15-Minute Test Drive Checklist Before You Buy
If you can test a scooter in person, use a structured routine. Fifteen minutes is often enough to reveal reach problems, hand fatigue, or confusing controls. Bring your cane, walker, brace, gloves, oxygen tubing, bag, or anything else you normally use so the test reflects real life.
- Sit down, swivel if needed, and lock the seat before driving.
- Adjust the tiller and confirm it locks firmly.
- Start and stop 10 times at a low speed.
- Make at least 5 left turns and 5 right turns.
- Drive in reverse for a short distance while looking behind you safely.
- Adjust the speed dial without leaning forward.
- Use the horn, lights, key, and any display buttons.
- Release the throttle suddenly at slow speed to feel the automatic brake.
- Try the controls with your weaker hand, if that is realistic for daily use.
- After 15 minutes, rate pain or fatigue in your thumb, fingers, wrist, elbow, and shoulder.
A good fit should feel boring in the best way: easy to start, easy to stop, and easy to steer without thinking about your hands. If you have to concentrate on holding the throttle just right, keep looking.
Setup and Maintenance Checks Every 30 Days
Even a well-fitted scooter can become harder to use if controls loosen, grips wear down, or the tiller adjustment slips. A quick monthly check can keep small comfort problems from becoming safety issues.
Every 30 days, check that the tiller lock holds firmly, the throttle returns to neutral when released, and the speed control does not move too easily or stick. Wipe the grips so they are not slick. If the scooter has removable armrests or an adjustable seat, confirm they are locked in place.
Battery charge also affects confidence. A low battery may change how a scooter responds, especially near the end of a trip. Get in the habit of checking the battery gauge before leaving home, and learn how the gauge behaves under load, because some indicators drop when climbing a ramp or driving over carpet.
If a control becomes stiff, loose, cracked, or unpredictable, stop using the scooter until it is inspected by a qualified technician or service provider. Do not tape down a throttle or modify controls in a way that prevents normal stopping.
FAQ: Mobility Scooter Controls and Tiller Fit
Is a delta tiller better for arthritis?
A delta tiller is often easier for arthritis because the wraparound shape can reduce the need for a tight grip. It also may allow one-handed steering at low speeds. Still, test it for at least 10 minutes because thumb or finger paddle placement varies by scooter type.
What tiller position is most comfortable?
Most riders do best with the tiller close enough to keep the elbows slightly bent, often around 90 to 120 degrees, while the wrists stay neutral. You should not need to lean forward or raise your shoulders to reach the throttle.
Are mobility scooter brakes hand-operated?
Many mobility scooters use automatic electromagnetic braking, which engages when you release the throttle. Some scooters also have manual brake, parking brake, or freewheel controls. Always test stopping from about 10 feet at low speed so you know how it feels.
What if one hand is much stronger than the other?
Look for controls that can be comfortably operated from the stronger side and a tiller shape that supports stable steering. Test forward, reverse, horn, speed adjustment, and stopping with that hand before committing.
Can I modify scooter controls for easier use?
Do not make homemade changes that affect throttle return, braking, or steering. If you need adaptations, speak with a qualified mobility equipment provider or occupational therapist. Safety-critical controls should remain reliable and able to return to neutral.
Frequently asked questions
Is a delta tiller better for arthritis? +
A delta tiller is often easier for arthritis because the wraparound handle can reduce the need for a tight grip and may allow low-speed one-handed steering. The exact throttle placement still matters, so test it for at least 10 minutes.
What is the best tiller position for limited reach? +
Set the tiller so your back stays against the seat, your shoulders stay relaxed, and your elbows remain slightly bent, often around 90 to 120 degrees. You should not have to lean forward to reach the throttle.
Which throttle type is easiest with weak grip? +
Many riders with weak grip prefer a large, light-touch paddle on a delta tiller because it reduces squeezing. Some prefer finger operation instead of thumb operation, so the best choice depends on which joints are stronger and less painful.
Do mobility scooters require squeezing a hand brake? +
Many mobility scooters use automatic electromagnetic braking that engages when the throttle is released, so a separate hand brake may not be needed for normal stopping. Some scooters still include manual brake or freewheel controls that should be tested and understood.
How long should I test scooter controls before buying? +
A 10- to 15-minute test is much more useful than a quick sit. Include starts, stops, left and right turns, reverse, speed adjustment, horn use, and a check for hand, wrist, shoulder, or thumb fatigue.
Related guides
Delta Tiller vs. Standard Scooter Handles: Steering Comfort, Grip Strength, and Control Differences
12 min read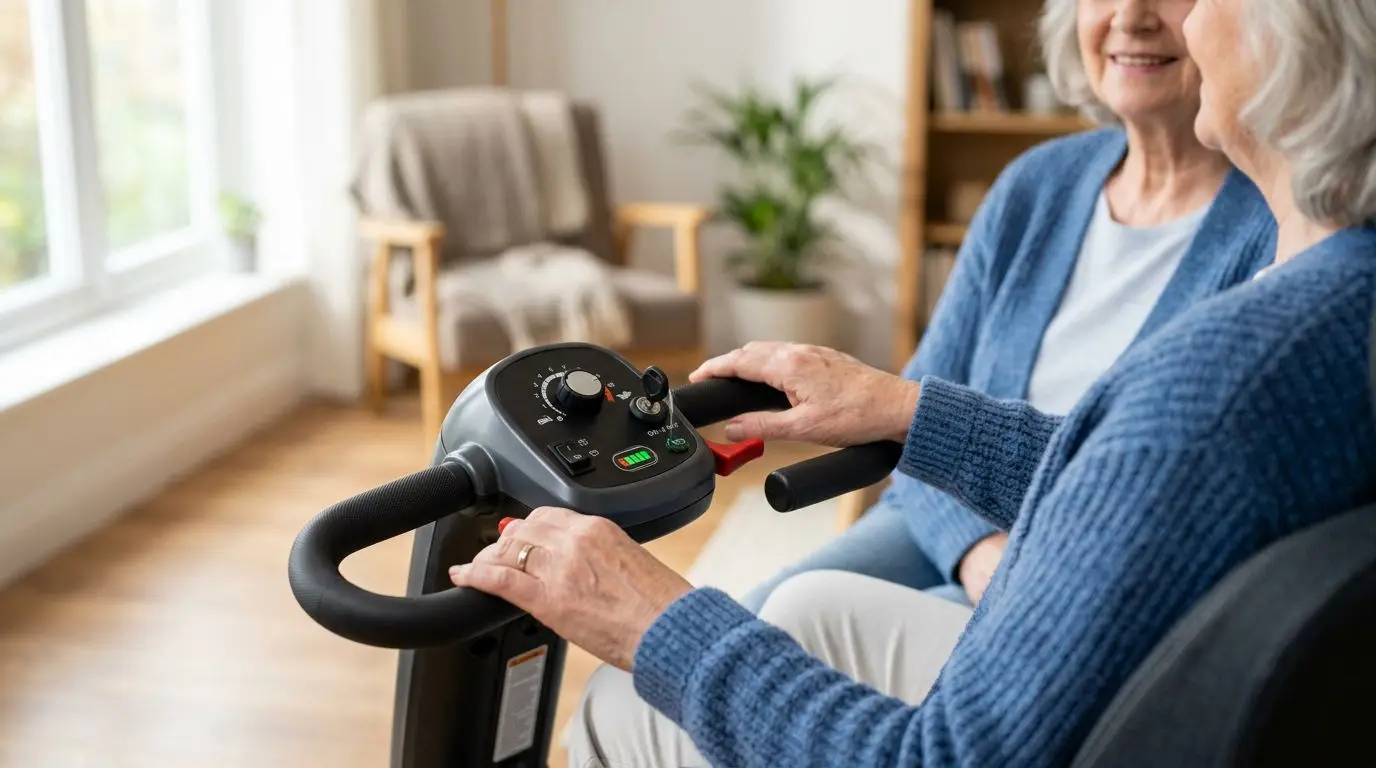
Mobility Scooter Controls Explained: Throttles, Brakes, Speed Settings, and Ease of Use
15 min read
Joystick-Control Mobility Scooters vs. Tiller Steering: Which Control Style Fits Your Needs?
13 min read