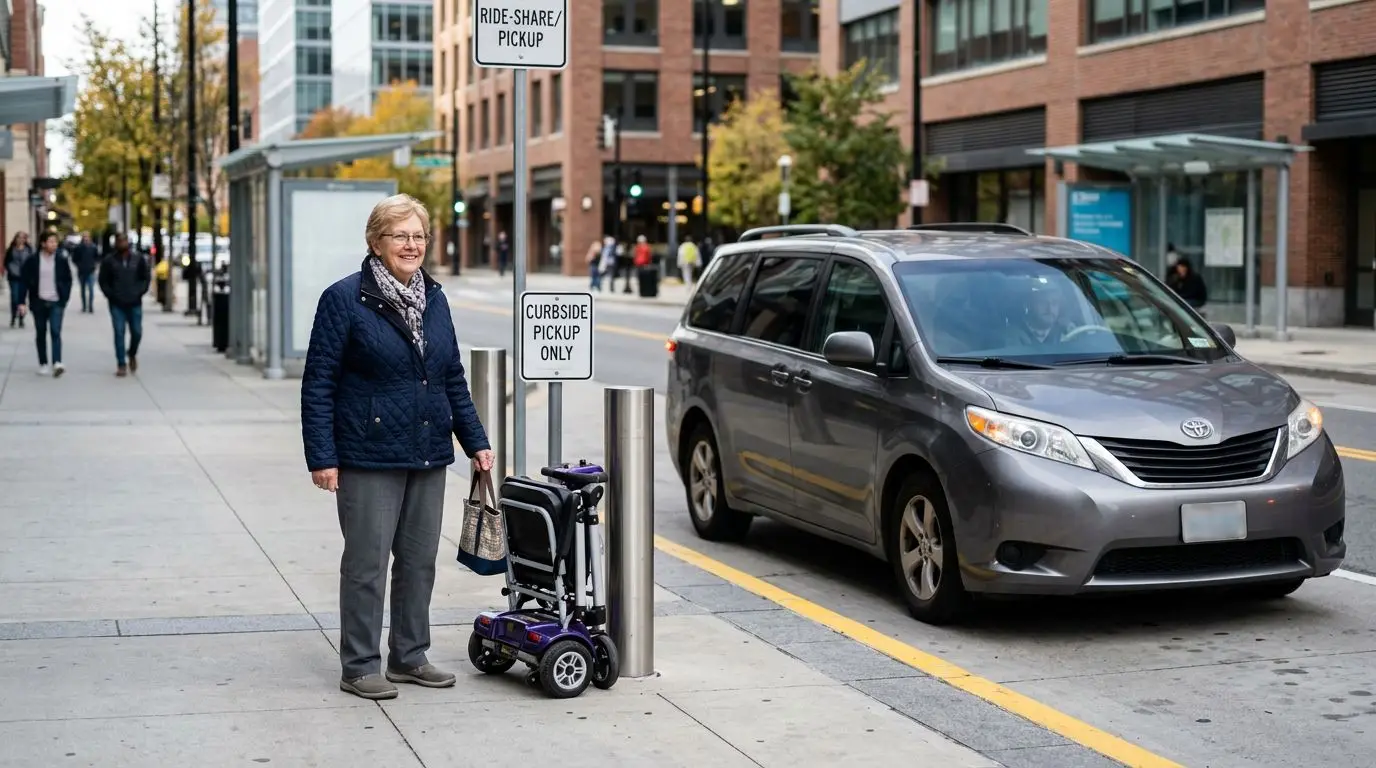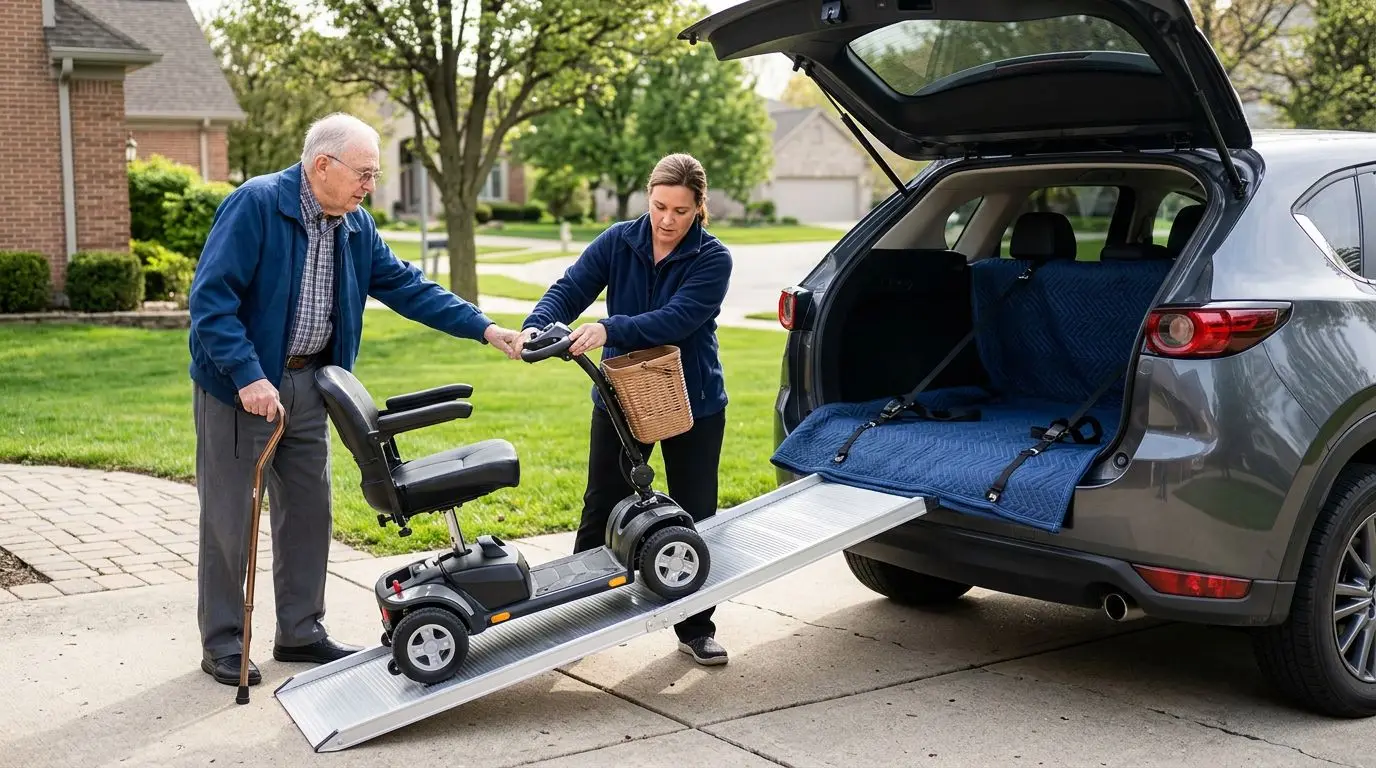
The safest way to load and secure a mobility scooter is to reduce the weight you have to lift, use a ramp or lift when the scooter is too heavy, and tie the frame down so it cannot roll, tip, or hit the vehicle interior. Remove loose parts, protect the tiller and controls, and use at least 4 secure tie-down points whenever the scooter travels assembled. If any step requires twisting, lifting overhead, or handling more weight than you can comfortably manage, use mechanical help or ask a second person.
Transporting a scooter is not only about getting it into a trunk. You are managing 3 risks at the same time: injury to the person loading it, damage to the scooter, and scooter movement during a sudden stop. A few measurements and a repeatable routine make the job much safer.
Before You Lift: 5 Safety Checks That Prevent Most Problems
Start with the basics before the scooter gets near the bumper. A compact travel scooter may separate into pieces, but the heaviest section can still weigh 30 to 60 pounds. A full-size scooter can weigh well over 150 pounds with batteries installed. Guessing is where trouble begins.
- Check the owner information for component weights. If the battery pack, seat, or rear drive section has its own weight listed, use those numbers to decide who lifts each part.
- Turn the scooter off and remove the key. Accidental throttle contact during loading can damage a wall, bumper, or foot.
- Set the scooter to drive mode, not freewheel, once positioned. Freewheel helps when pushing, but the scooter can roll unexpectedly if left unlocked on a ramp or carrier.
- Remove loose items. Baskets, cup holders, cushions, oxygen-bottle holders, bags, and canes can shift during transport.
- Plan the lift path. Clear at least 3 feet around the rear of the vehicle so the person loading does not trip while carrying a battery or seat.
Wear shoes with solid soles and gloves if the scooter frame has narrow edges. If you use a powered hatch, pause before loading and make sure it will not close automatically while the scooter is partly inside. One surprise movement can crack plastic shrouds or pinch fingers.
Choose the Right Loading Method: 3 Common Setups Compared
The right method depends on scooter weight, vehicle height, and the loader’s physical ability. A sedan trunk, a minivan cargo floor, and a pickup bed create very different loading problems. Even a 4-inch difference in bumper height can change whether a ramp feels manageable.
| Loading method | Best fit | Typical effort | Main caution |
|---|---|---|---|
| Disassemble and lift into trunk or cargo area | Travel scooters designed to come apart | Several smaller lifts, often 20 to 60 lb each | Do not lift the rear drive section by plastic body panels |
| Use a portable ramp into a van, SUV, or hatchback | Scooters that can roll in assembled | Pushing or powered loading up an incline | Ramp must be long enough and rated for combined weight |
| Use an exterior carrier or vehicle lift | Heavier scooters or frequent transport | Least manual lifting after setup | Vehicle hitch rating, ground clearance, and secure tie-downs matter |
Disassembly is usually the simplest option for small travel scooters, especially when the user travels in a standard car. Ramps work best when the cargo opening is wide and low enough for the scooter to enter without the tiller hitting the roofline. Exterior carriers solve many interior space issues, but they expose the scooter to road spray and require the vehicle to safely handle the added rear load.
How to Measure Your Vehicle, Scooter, and Ramp in 10 Minutes
Measure before you buy a ramp, plan a trip, or ask someone to help. You need 6 numbers: scooter length, scooter width, scooter height at the tiller or seat back, cargo opening width, cargo opening height, and floor height from the ground. A tape measure and 10 minutes can prevent a damaged bumper or an unsafe ramp angle.
For interior transport, measure the narrowest point, not the widest. On many vehicles, the hatch opening is tighter near the wheel wells or roof trim. If the scooter is 24 inches wide and the cargo opening narrows to 25 inches, that leaves only 1 inch total clearance. That is tight enough to scrape armrests, mirrors, or plastic fenders.
Ramp length matters just as much. A common practical guideline is to use about 1 foot of ramp for every 2 inches of rise when a person will push or walk beside the scooter. For example, a 16-inch cargo floor height calls for roughly an 8-foot ramp for a gentler approach. Shorter ramps may work for powered loading, but they increase the chance of bottoming out or losing control.
Check ramp width as well. A scooter with a 22-inch track width may need a ramp surface wider than 26 inches so the wheels do not ride close to the edge. If you use two separate ramp tracks, the spacing must match the scooter’s front and rear wheel paths. Track ramps can be risky with 3-wheel scooters because the single front wheel may not have a stable path.
Step-by-Step: Loading a Disassembled Scooter in About 15 Minutes
Many travel scooters are built to come apart without tools, but the order matters. A calm, repeatable 15-minute routine is safer than rushing at the curb while someone holds traffic. Work on level pavement whenever possible.
- Park on level ground and set the vehicle brake. Open the trunk, hatch, or liftgate fully. Move floor mats or cargo covers out of the way.
- Power down the scooter. Remove the key and confirm the throttle is not active.
- Remove the basket and accessories. Pack small items separately so they do not scratch the scooter body.
- Take off the seat. Lift straight up if the seat post allows it. Avoid twisting your back while pulling.
- Remove the battery pack if designed to be removable. Use the built-in handle if present. Keep terminals protected and place the battery upright.
- Fold or lower the tiller. Do not force cables. Leave enough slack so wiring is not pinched.
- Separate the front and rear sections if the scooter is designed for it. Lift by metal frame points, not by plastic covers or the tiller.
- Load the heaviest piece first. Slide rather than lift when the vehicle floor height allows it. Use a blanket or cargo mat to protect trim.
- Place lighter parts around it. Keep the seat post, armrests, and tiller from pressing against the control panel.
Good body mechanics are straightforward: keep the load close, bend at the knees, and do not lift while turned sideways. If one piece feels too heavy after a test lift, stop. That is not a failure; it is useful information. Use a ramp, ask for help, or choose another transport method.
Step-by-Step: Loading with a Ramp or Exterior Carrier at a 2:1 Ramp Ratio or Better
Ramp loading can be safe, but it takes attention. The scooter, ramp, and user work as one system. The ramp must be rated for the total weight placed on it, including the scooter and any person standing or walking on the ramp if applicable. A 250-pound scooter plus a helper on the ramp can exceed a light-duty ramp quickly.
Set the ramp on level, dry ground when possible. Confirm the upper lip is fully seated on the vehicle floor or carrier platform. If the ramp has a safety strap or pin, use it. A ramp that kicks out by just 2 inches can drop the scooter suddenly.
For powered loading, stand to the side rather than directly behind the scooter when you can. Use the slowest speed setting. Keep one hand ready at the tiller, but do not pull the tiller sideways as a lifting handle. The tiller controls steering and electronics; it is not a frame-mounted hoist point.
For manual pushing, place the scooter in freewheel only while moving it deliberately, then return it to drive mode once it is positioned. Two helpers are often safer on steeper ramps: one guiding the tiller and one stabilizing from the rear or side. Avoid placing one person downhill directly in line with the scooter.
Exterior carriers require a few extra checks. Confirm the carrier is locked into the hitch and that the platform does not wobble excessively. After loading, fold any ramp section and secure it with the provided latch or pin. Recheck visibility of brake lights and license plate according to local rules. If the scooter sits low behind the vehicle, drive slowly over steep driveways to avoid scraping.
Securing the Scooter: 4 Tie-Down Points and the Right Straps
A scooter that fits in the vehicle is not automatically safe. During a sudden stop from 30 mph, an unsecured scooter can slide hard enough to damage seats, panels, glass, or itself. The goal is to prevent rolling, tipping, and bouncing.
Use 4 tie-down points when transporting an assembled scooter: two forward and two rearward. Attach straps to strong frame members when accessible, not to the seat, armrests, basket, plastic shrouds, or tiller. Soft loops can help protect the frame finish and create safer attachment points.
| Feature | Good choice | Avoid |
|---|---|---|
| Strap type | Cam buckle or ratchet straps rated for transport | Elastic cords as the primary restraint |
| Attachment point | Metal frame or designated securement point | Plastic panels, basket brackets, armrests |
| Direction | Opposing angles, front and rear | All straps pulling the same direction |
| Wheel control | Drive mode engaged, wheels chocked if needed | Freewheel left on during travel |
Do not over-tighten ratchet straps until the scooter suspension is crushed. Aim for snug: firm enough that the scooter cannot shift, but not so tight that a plastic panel bends or the frame is pulled out of alignment. If you are carrying disassembled pieces inside the vehicle, secure the heaviest section with cargo straps or place it low against a seat back. A battery pack should not be free to tip, slide, or strike metal objects.
After the first 5 to 10 minutes of driving, pull over in a safe place and recheck the straps. Webbing can settle, tires can compress, and a carrier can shift slightly. This quick check is especially helpful after loading in rain or on a cold morning when straps may be stiff.
Common Mistakes That Cause Damage or Injury in Under 60 Seconds
Most transport damage happens during short, awkward moments: the scooter catches on a hatch edge, a helper grabs the wrong part, or the ramp is a little too steep. These mistakes are common, and they are preventable.
- Lifting by the tiller. The tiller may look sturdy, but it contains steering and control components. Use frame points instead.
- Leaving the key in place. A bumped throttle can move the scooter at the worst time.
- Forgetting ground clearance. Low battery cases or anti-tip wheels can scrape when ramp angles are too sharp.
- Using a ramp that is too narrow. A wheel near the edge leaves no room for steering correction.
- Letting the scooter ride in freewheel. Freewheel can allow rolling even when the scooter appears parked.
- Securing to removable parts. Seats, baskets, and armrests can detach or bend under strap tension.
- Stacking heavy items on the control console. Displays, throttle paddles, and key switches are not designed to carry luggage.
- Ignoring weather. Rain can make ramps slick, while road salt can corrode exposed metal if not cleaned off after exterior transport.
Another common problem is closing the hatch too soon. Before you shut the trunk or liftgate, check the highest point of the scooter and the position of the tiller. Leave at least a small air gap so the hatch does not press on the control area. A folded blanket can protect trim, but it should not create pressure on fragile parts.
Who This Is Best For—and When 1 Extra Helper Is the Safer Choice
Disassembling and loading a scooter can work well for people who can safely lift the heaviest component, have good balance, and transport the scooter occasionally. A travel scooter that separates into manageable sections is often realistic for a caregiver or active user with a hatchback, wagon, or small SUV. The key question is not whether the scooter technically fits; it is whether the loading process can be repeated safely on a tired day.
A ramp or carrier is a better fit when the scooter is too heavy to lift, transport happens several times per week, or the user must load it without straining. If the scooter weighs 150 pounds assembled and the heaviest section is not removable, routine manual lifting is usually not a good plan. Mechanical assistance protects both the person and the scooter.
Get one extra helper when the ramp is steep, the ground is uneven, the scooter has limited ground clearance, or the loading area is busy. Get professional advice before using a hitch carrier if you are unsure about tongue weight, hitch class, rear suspension sag, or whether the carrier blocks lights. These are vehicle safety questions, not scooter preferences.
For air travel, medical transport, or wheelchair-accessible vans, different securement standards may apply. This guide is focused on personal vehicle transport by car, SUV, van, pickup, or hitch-mounted carrier.
FAQ: 5 Practical Answers Before Your Next Trip
Can I lay a mobility scooter on its side in a car?
Only do this if the scooter documentation allows it and the battery type and design permit it. Many scooters have components, panels, or battery packs that can be damaged when laid sideways. If you must angle a disassembled section, protect the controls and keep removable batteries upright.
How many tie-down straps do I need?
Use 4 straps for an assembled scooter whenever possible: two pulling forward or outward and two pulling rearward or outward. Disassembled parts may need fewer straps, but the heaviest section should still be restrained so it cannot slide during braking.
Is it safe to drive a scooter up a ramp into an SUV?
It can be safe if the ramp is rated for the load, long enough for the floor height, wide enough for the wheels, and firmly secured. Use the slowest speed setting and avoid standing directly downhill from the scooter. If the ramp feels steep or unstable, stop and use a longer ramp or another method.
Should I remove the battery before transport?
Remove it if the scooter is designed that way and it makes lifting safer. A removable battery pack can reduce the weight by several pounds or more, depending on the scooter. Keep it upright, protected from short circuits, and secured during travel.
What is the biggest sign my setup is unsafe?
If loading requires one person to lift more than they can comfortably control, the setup is unsafe. Other warning signs include a ramp that slips, wheels riding within 1 inch of the ramp edge, the scooter scraping at the ramp breakover point, or straps attached to plastic parts.
Frequently asked questions
Can I lay a mobility scooter on its side in a car? +
Only if the scooter documentation allows it. Many scooters have panels, controls, or battery packs that can be damaged when laid sideways. Keep removable batteries upright and protect the tiller and controls.
How many tie-down straps do I need for a mobility scooter? +
Use 4 tie-down straps for an assembled scooter whenever possible: two at the front and two at the rear, attached to strong frame points rather than plastic panels, the seat, armrests, basket, or tiller.
Is it safe to drive a mobility scooter up a ramp into an SUV? +
It can be safe when the ramp is properly rated, secured to the vehicle, long enough for the cargo floor height, and wide enough for the scooter wheels. Use the slowest speed setting and stop if the ramp slips or feels too steep.
Should I remove the battery before transporting a scooter? +
Remove the battery if the scooter is designed for it and doing so makes loading safer. Secure the battery upright during travel and keep the terminals protected from metal objects.
What is the biggest warning sign that my loading setup is unsafe? +
The clearest warning sign is needing to lift or control more weight than you can handle comfortably. Other red flags include a slipping ramp, wheels close to the ramp edge, scraping under the scooter, or straps attached to removable parts.
Related guides
How to Transport a Mobility Scooter by Car: Lifts, Hitch Carriers, Ramps, and Portable Options
14 min read
How to Transport a Mobility Scooter in a Car, SUV, or Van
14 min read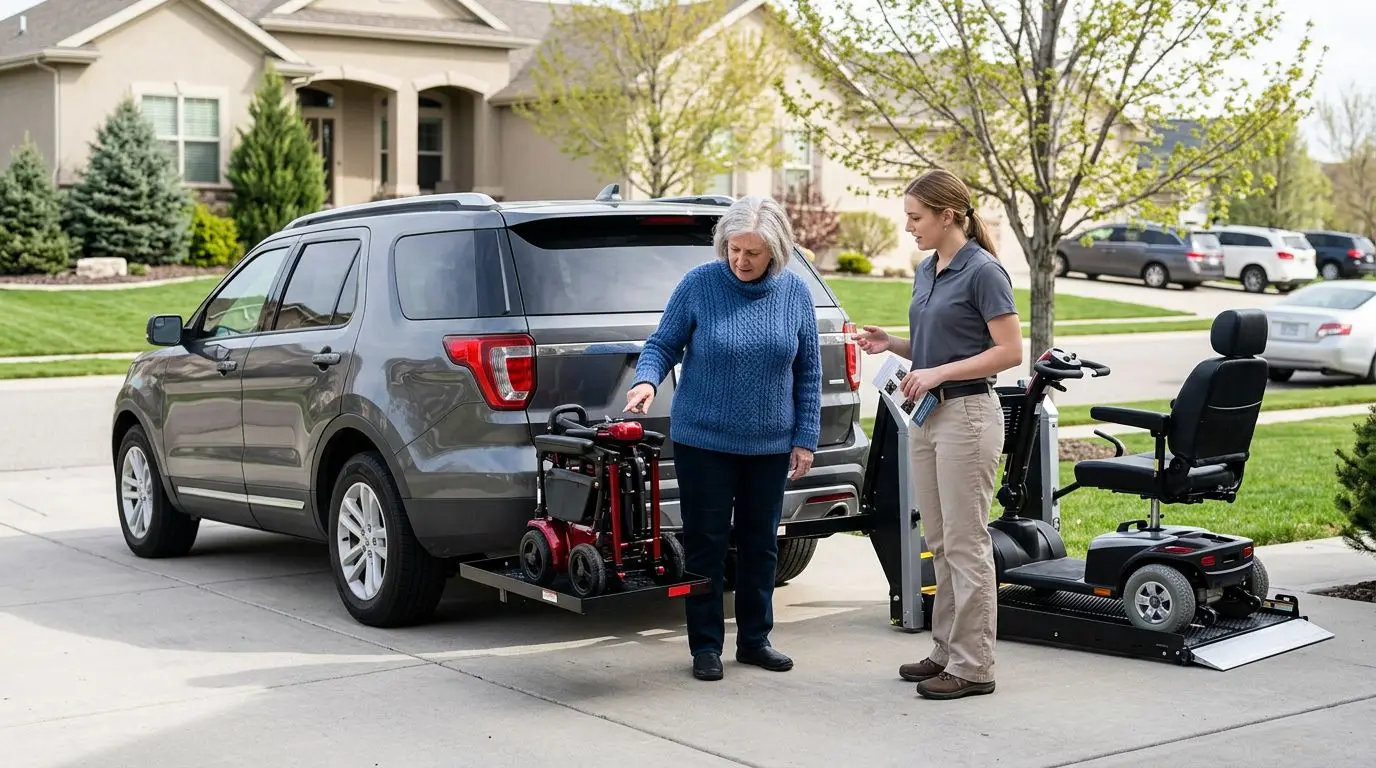
Mobility Scooter Carriers vs. Vehicle Lifts: Which Transport Option Makes Sense?
16 min read