
A good mobility scooter maintenance schedule is straightforward: do a quick safety check every week, a deeper inspection once a month, and a focused checklist before any longer trip. The key items are battery condition, tires, brakes, lights, loose fasteners, cleaning, and proper storage.
Preventive maintenance helps you catch small problems before they affect reliability or safety. It does not replace the owner’s manual or professional service, but it does give you a practical routine you can follow at home with basic tools and about 10 to 30 minutes at a time.
Weekly 10-minute mobility scooter check
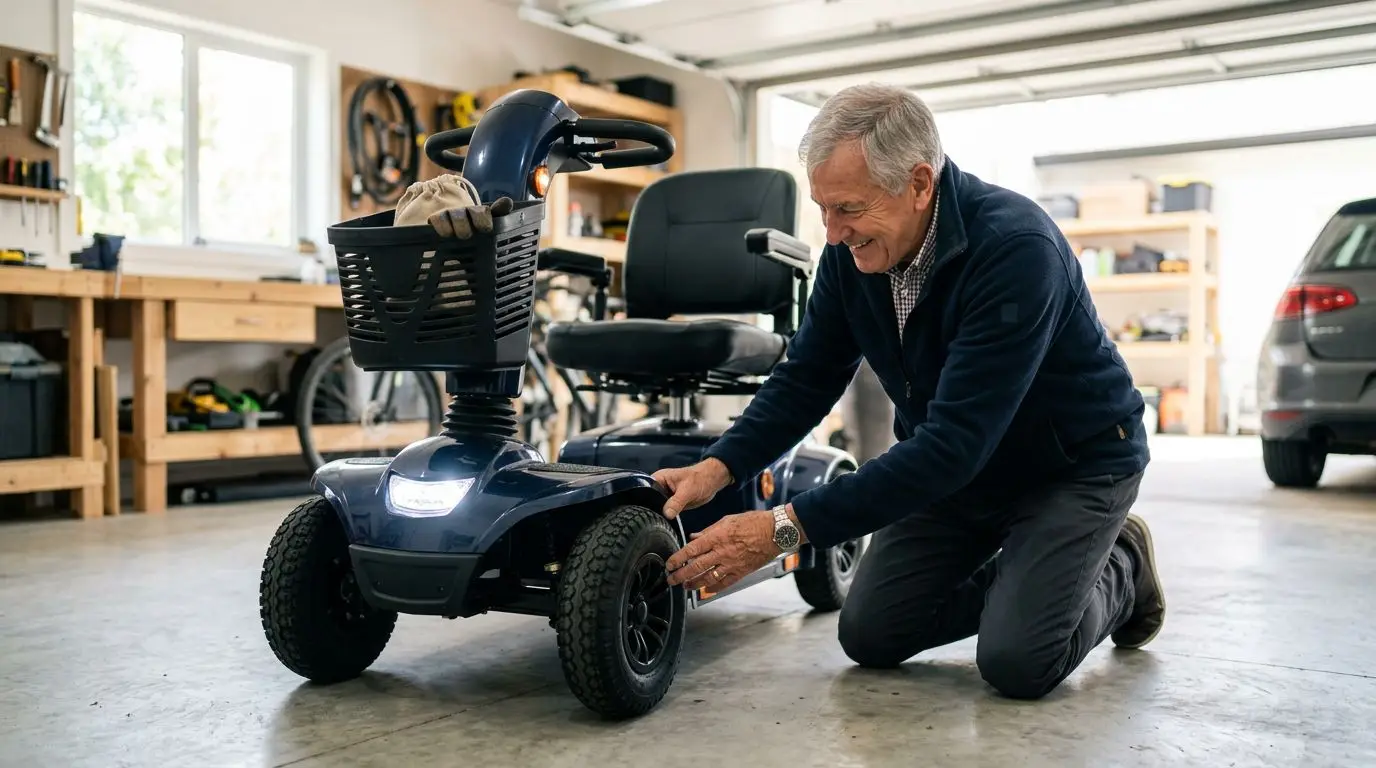
A weekly check should take about 10 minutes and works best when you do it in the same place each time, such as a garage, entryway, or covered patio. Choose a flat, dry surface with at least 6 feet of open space so you can roll forward, stop, and turn safely.
This is the check that catches everyday issues: a low battery, a soft tire, a loose armrest, or a light that stopped working. If you use your scooter daily, weekly is the minimum. If you ride outdoors on rough sidewalks, gravel, ramps, or curb cuts, check it more often.
| Weekly item | What to do | Why it matters |
|---|---|---|
| Battery gauge | Confirm the scooter starts with a strong charge before leaving home. | Low charge can reduce range and leave you stranded. |
| Tires | Look for cuts, embedded debris, flat spots, or low pressure if pneumatic. | Tire problems affect steering, comfort, and braking. |
| Brakes | At slow speed, release the throttle and confirm the scooter stops smoothly. | Most scooters rely on electronic braking that should feel predictable. |
| Lights and horn | Turn on headlight, taillight, turn signals if equipped, and horn. | Visibility matters in parking lots, hallways, and dusk conditions. |
| Seat and tiller | Check that the seat locks and the tiller adjustment is secure. | A loose seat or tiller can affect control. |
| Fasteners | Look for obvious loose knobs, screws, clips, or battery cover movement. | Vibration can loosen hardware over time. |
Keep it simple. If something feels different from last week, treat that as useful information. New rattles, slower starts, and longer stopping distances are all signs to pause and inspect more closely.
Monthly 30-minute preventive inspection
Once a month, set aside time for a more detailed 30-minute inspection. Clean the scooter, check the battery area, inspect fasteners more carefully, and look at wear items that are easy to miss during a quick weekly check.
Start with the scooter powered off and the key removed. If your scooter has removable battery packs, make sure they are seated correctly before and after the inspection. Do not open sealed battery cases or electrical components unless the owner’s manual specifically tells you to.
- Clean the scooter body: Use a damp cloth, not a hose or pressure washer. Water forced into controls, motors, or battery compartments can cause problems.
- Inspect battery terminals or connectors: Look for looseness, corrosion, cracked plastic, or damaged wiring. If you see corrosion or heat damage, stop using the scooter until it is serviced.
- Check tire wear: Compare the left and right tires. Uneven wear can point to alignment issues, overloading, or frequent turns on one side.
- Check the anti-tip wheels: Make sure they are present, not cracked, and not rubbing continuously during normal riding.
- Inspect the seat post and locking pin: Confirm the seat height adjustment, swivel lock, and seat latch work securely.
- Look over the charger cord: Check both ends for fraying, bent prongs, loose connectors, or overheating marks.
A monthly inspection is also a good time to record the date, mileage if your scooter has an odometer, and any symptoms. A simple notebook works. After 6 months, that record can help you notice battery range changes or recurring tire issues.
Before longer trips of 2 miles or more
Before a longer outing, especially anything over 2 miles from home or involving public spaces, ramps, elevators, or transportation, do a trip-specific check. Longer trips put more demand on batteries, tires, and brakes because you may be away from a charger or repair help.
Charge the scooter fully the night before unless your owner’s manual gives different instructions. In the morning, confirm the charger has completed its cycle and the battery indicator reads full. A full indicator does not guarantee maximum range, but it gives you the best starting point.
Pre-trip checklist
- Battery: Start fully charged and know your realistic range, not just the advertised maximum.
- Route: Avoid steep hills, broken sidewalks, construction zones, and long detours when possible.
- Tires: Check pressure on pneumatic tires and inspect solid tires for cracks or chunking.
- Brakes: Test stopping in a clear 10-foot area before leaving.
- Lights: Use lights in parking lots, cloudy weather, early morning, and evening.
- Fasteners: Confirm removable baskets, armrests, seat locks, and battery packs are secure.
- Weather: Avoid heavy rain, standing water, snow, and ice. Most scooters are not built for water exposure.
- Phone and contacts: Carry a charged phone and a backup plan if the scooter loses power.
If you are transporting the scooter in a vehicle, check the disassembly points before lifting. Battery packs, seats, and front or rear sections must latch fully when reassembled. A scooter that is not locked together correctly can feel unstable within the first few feet.
Battery care every charge cycle, 2 to 4 weeks in storage
Batteries are the heart of a mobility scooter, and they are also one of the most common reasons performance drops. Many scooter batteries lose capacity gradually, so the first warning may be shorter range rather than sudden failure.
Charge in a dry, ventilated location at normal room temperature whenever possible. A common storage target is about 50 to 75 degrees Fahrenheit. Avoid charging near heaters, direct sun, flammable materials, or wet floors.
| Battery-related task | How often | Practical tip |
|---|---|---|
| Recharge after use | After regular outings | Do not routinely leave the scooter deeply discharged. |
| Check charger lights | Every charge | Know what normal charging and full-charge indicators look like. |
| Inspect charger cord | Monthly | Replace or service damaged cords; do not tape over serious damage. |
| Charge during storage | Every 2 to 4 weeks, or as the manual states | Stored batteries can self-discharge even when the scooter is off. |
| Watch range changes | Monthly | A noticeable drop in familiar trips may point to battery aging. |
Do not mix old and new batteries in a multi-battery scooter unless a qualified technician or the manual says it is acceptable. Paired batteries usually need to be matched in type, size, and condition to work properly. Never use a charger that does not match the scooter’s battery system.
Battery chemistry matters. Sealed lead-acid batteries are common in many scooters and are heavy but familiar. Lithium batteries are lighter and may charge differently. The right maintenance routine depends on the battery type, so use the label and manual as your guide.
Tire checks: pressure, tread, and 1-inch debris problems
Tires affect ride comfort, steering, range, and braking. A tire that is low by even a small amount can make a scooter feel sluggish and may reduce travel distance, while a damaged tire can cause wobble or pulling.
There are two broad tire types: pneumatic and solid. Pneumatic tires contain air and usually provide a softer ride, but they must be checked with a pressure gauge. Solid tires do not need air, but they can still crack, flatten, or wear unevenly.
| Tire type | Maintenance needs | Best for | Watch for |
|---|---|---|---|
| Pneumatic, air-filled | Check pressure, valve stems, tread, and punctures | Riders who want more cushioning outdoors | Slow leaks, low pressure, thorns, glass, curb damage |
| Solid rubber or foam-filled | Inspect for cracks, flat spots, and wear | Riders who want lower puncture risk | Rougher ride, chunking, uneven wear |
| Small indoor-style tires | Clean tread and inspect for hair, string, or debris | Tight indoor spaces and smooth surfaces | Less comfort over cracks, thresholds, and gravel |
| Larger outdoor-style tires | Check sidewalls and tread more often | Sidewalks, parks, and longer outdoor routes | Embedded stones, sidewall scuffs, mud buildup |
For pneumatic tires, use the pressure listed on the tire sidewall or in the manual. Do not guess. If the sidewall lists a maximum pressure, do not exceed it. Check pressure when the tire is cool, before a long ride rather than after one.
Remove debris when it is safe to do so. A small pebble may not matter, but a 1-inch piece of glass, metal, or sharp gravel lodged in the tread should be handled before the next ride. If a tire repeatedly loses air, it needs repair or replacement, not repeated topping off.
Brake and control test in a clear 10-foot space
Most mobility scooters use an electronic or electromagnetic braking system tied to the throttle. In normal use, releasing the throttle should slow and stop the scooter without jerking. Some scooters also have a freewheel lever that disengages the drive system for manual pushing.
Test braking in a clear 10-foot area at the lowest speed setting. Move forward slowly, release the throttle, and confirm the scooter stops in a straight, controlled manner. Then test reverse at a very low speed if you use reverse regularly.
- Stop using the scooter if it rolls freely when it should be in drive mode. Check whether the freewheel lever is engaged.
- Do not ride if braking feels delayed, uneven, or unpredictable. This needs service.
- Listen for new grinding, scraping, or clicking. Some motor noise is normal, but new noises deserve attention.
- Check the throttle paddle or lever. It should return to neutral when released.
Controls should feel consistent. A sticky throttle, cracked speed dial, loose tiller, or intermittent power switch is more than an inconvenience. It can affect how confidently you maneuver in doorways, elevators, curb ramps, and store aisles.
Lights, horn, mirrors, and visibility checks in 60 seconds
A visibility check takes about 60 seconds and is worth doing more often than many people expect. Even if you usually ride indoors, lights and signals help in building lobbies, parking garages, apartment hallways, and shaded sidewalks.
Turn the scooter on and check every visibility feature it has. That may include a headlight, rear light, brake light, turn signals, reflectors, hazard lights, horn, and mirrors. Not every scooter has all of these features, so inspect what applies to yours.
| Feature | Check | Service cue |
|---|---|---|
| Headlight | Turns on steadily and points forward | Dim, flickering, or loose housing |
| Rear light | Visible from behind | Cracked lens or intermittent light |
| Turn signals | Left and right indicators work if equipped | One side flashes differently or not at all |
| Horn | Audible at a short distance | Weak sound or no response |
| Mirrors | Hold position after adjustment | Loose stalks or cracked glass |
Keep lenses clean. Dust, road film, and fingerprints can reduce light output. If you ride near traffic, across parking lots, or at dusk, consider light-colored clothing or reflective accessories. Visibility supports safety, but it does not make a scooter suitable for road travel where scooters are not allowed.
Fasteners, frame, and seat hardware every 4 weeks
Vibration loosens things. Every 4 weeks, look over the scooter’s hardware and frame connections, especially if you ride on brick sidewalks, uneven pavement, curb cuts, gravel paths, or thresholds.
Focus on parts you touch or adjust: armrests, seat bolts or knobs, basket brackets, tiller adjustment locks, battery box latches, and shroud panels. Use the correct tool size if a fastener needs tightening. Do not overtighten plastic panels or force a bolt that does not turn smoothly.
- Seat: Confirm the swivel lock clicks into position and the height adjustment pin is fully seated.
- Armrests: Check width adjustments and flip-up hinges.
- Tiller: Make sure the angle adjustment locks securely and does not slip under light pressure.
- Basket or accessory mounts: Remove excess weight and check for wobble.
- Battery compartment: Confirm covers and latches are secure after charging or transport.
- Frame sections: For folding or take-apart scooters, inspect latch points before every ride after assembly.
If you find a missing screw, cracked bracket, bent seat post, or damaged latch, do not ignore it. A small hardware issue can become a handling problem once the scooter is moving with the rider’s weight on it.
Cleaning and storage after rain, dust, or 30 days unused
Clean the scooter when it is visibly dirty, after dusty rides, after damp conditions, and before storage longer than 30 days. The goal is not to make it showroom-perfect. The goal is to keep debris away from moving parts, controls, tires, and electrical areas.
Use a soft cloth or sponge with mild soap and water. Wring the cloth out so it is damp, not dripping. Avoid spraying water directly into the tiller, throttle, charging port, battery compartment, motor area, or wheel hubs. Dry the scooter before storing it.
Storage checklist
- Store indoors or in a dry, covered location.
- Keep the scooter away from standing water, sprinklers, and direct weather exposure.
- Charge batteries before storage, then recharge every 2 to 4 weeks unless the manual says otherwise.
- Leave the scooter powered off and remove the key.
- Do not hang heavy bags from the tiller during storage.
- If using a cover, choose one that allows the scooter to stay dry and does not trap moisture.
Temperature matters. Very hot or very cold storage can reduce battery performance and may age plastics and rubber faster. If the scooter has been stored in a cold garage, let it return closer to room temperature before charging when practical.
Who this 3-level maintenance schedule is best for
This 3-level schedule is best for most scooter owners who want a practical routine without becoming a mechanic. It works for compact travel scooters, mid-size scooters, and larger outdoor scooters, as long as you adapt the details to your owner’s manual.
It is especially useful for riders who use a scooter several days a week, caregivers who help with charging and transport, and families who want one shared checklist posted near the charging area. It also helps seasonal users who may store a scooter for 30 days or longer.
| User situation | Best routine | Extra attention |
|---|---|---|
| Daily indoor rider | Weekly quick checks and monthly cleaning | Hair, string, and debris around small wheels |
| Outdoor sidewalk rider | Weekly checks plus tire inspection after rough routes | Tread damage, loose fasteners, lights |
| Occasional errand rider | Pre-ride check before every outing | Battery charge after sitting unused |
| Travel scooter user | Check latches after every disassembly | Battery seating, frame locks, seat attachment |
| Caregiver-assisted user | Shared written checklist | Charging routine and reporting new symptoms |
This schedule is not a substitute for professional repair. If the scooter shows electrical faults, brake problems, damaged wiring, battery swelling, burning smells, repeated fuse issues, or frame damage, stop using it and arrange service.
How to measure tire pressure, range, and charging habits
Good maintenance gets easier when you measure a few things the same way each time. You do not need complicated equipment. A tire pressure gauge, a notebook, and a regular charging location can tell you a lot over 3 months.
For tire pressure, find the recommended pressure on the tire sidewall or in the manual. Use a gauge that fits the small valve stem comfortably. Check before riding, while tires are cool. If your tires are solid, measure wear visually instead: look for flat spots, cracks, or uneven shape.
For range, track real trips rather than relying only on the battery gauge. Write down the starting charge, destination, approximate distance, terrain, rider load, and ending charge. If a familiar 4-mile errand used to leave half a charge but now nearly drains the scooter, that is a maintenance clue.
For charging habits, keep the charger in one safe location and note any unusual behavior. A charger that suddenly takes much longer, finishes too quickly, becomes unusually hot, or shows unfamiliar indicator lights should be checked. Always follow the scooter and charger instructions.
When to stop riding and call for service within 1 day
Some issues should not wait for the next monthly check. If a scooter has a control, brake, battery, or structural problem, stop riding and arrange service as soon as possible, ideally within 1 day for anything safety-related.
- The scooter moves when the throttle is not being pressed.
- The throttle sticks or does not return to neutral.
- The scooter will not stop normally when the throttle is released.
- You smell burning, see smoke, or notice melted plastic near the charger or battery area.
- A battery case appears swollen, cracked, leaking, or unusually hot.
- The scooter suddenly loses power during normal use.
- The frame, tiller, seat post, or wheel assembly is bent or cracked.
- A tire is flat, separating, badly cracked, or rubbing the frame.
Do not try to bypass safety features, tape down controls, use mismatched chargers, or ride in freewheel mode. These shortcuts can create bigger hazards. When in doubt, park the scooter, remove the key, and ask a qualified technician or the scooter provider for guidance.
Printable maintenance schedule: weekly, monthly, and trip checks
Use this 12-line checklist as a quick reference near your charging area. If more than one person helps maintain the scooter, add initials and dates so everyone knows what has been checked.
| Schedule | Checklist |
|---|---|
| Weekly | Battery gauge, tires, brakes, lights, horn, seat lock, tiller lock, obvious loose parts |
| Monthly | Clean scooter, inspect charger cord, check battery area, inspect fasteners, review tire wear, test mirrors and accessories |
| Before longer trips | Full charge, route plan, tire check, brake test, light check, phone charged, weather check, transport latches secure |
| During storage | Keep dry, power off, charge every 2 to 4 weeks, inspect before first ride back |
A steady routine is easier than a major repair. Spend a few minutes each week, write down anything unusual, and take small changes seriously. That is the practical heart of mobility scooter maintenance.
FAQ: 5 common mobility scooter maintenance questions
How often should I charge my mobility scooter?
For regular use, charge after outings or as directed by the owner’s manual. Avoid letting the battery sit deeply discharged. During storage, many scooters need charging every 2 to 4 weeks, but the correct interval depends on battery type and manufacturer instructions.
Can I wash a mobility scooter with a hose?
No. Use a damp cloth instead of a hose or pressure washer. Direct water can get into the tiller, controls, charging port, battery compartment, motor area, or wheel hubs and cause electrical or corrosion problems.
What should I check if my scooter range is getting shorter?
Start with charging habits, battery age, tire pressure, rider load, terrain, and temperature. Low pneumatic tires, hills, cold weather, and aging batteries can all reduce range. If the change is sudden or severe, have the scooter and charger checked.
How do I know if my scooter brakes need service?
Test braking at low speed in a clear 10-foot space. If the scooter does not stop smoothly when you release the throttle, rolls in drive mode, jerks, drifts, or makes new grinding noises, stop using it and arrange service.
Should I maintain solid tires?
Yes. Solid tires do not need air pressure checks, but they still need inspection for cracks, flat spots, uneven wear, embedded debris, and chunking. A damaged solid tire can affect steering and comfort.
Frequently asked questions
How often should I charge my mobility scooter? +
For regular use, charge after outings or as directed by the owner’s manual. Avoid letting the battery sit deeply discharged. During storage, many scooters need charging every 2 to 4 weeks, depending on battery type and instructions.
Can I wash a mobility scooter with a hose? +
No. Clean with a damp cloth instead of a hose or pressure washer. Direct water can enter controls, charging ports, battery areas, motors, or wheel hubs and cause electrical or corrosion problems.
What should I check if my scooter range is getting shorter? +
Check charging habits, battery age, tire pressure, rider load, terrain, and temperature. Low tires, hills, cold weather, and aging batteries can reduce range. A sudden change should be inspected by a qualified technician.
How do I know if my scooter brakes need service? +
Test braking at low speed in a clear 10-foot space. If the scooter does not stop smoothly when you release the throttle, rolls in drive mode, jerks, drifts, or makes new grinding noises, stop using it and arrange service.
Do solid mobility scooter tires need maintenance? +
Yes. Solid tires do not need air pressure checks, but they still need inspection for cracks, flat spots, uneven wear, embedded debris, and chunking that can affect steering and ride comfort.
Related guides
Pre-Ride Mobility Scooter Safety Checklist: Tires, Battery, Brakes, Lights, and Loose Parts
13 min read
The Total Cost of Owning a Mobility Scooter: Batteries, Repairs, Accessories, Transport, and Maintenance
15 min read
How to Make Mobility Scooter Batteries Last Longer: Charging, Storage, and Cold-Weather Care
12 min read