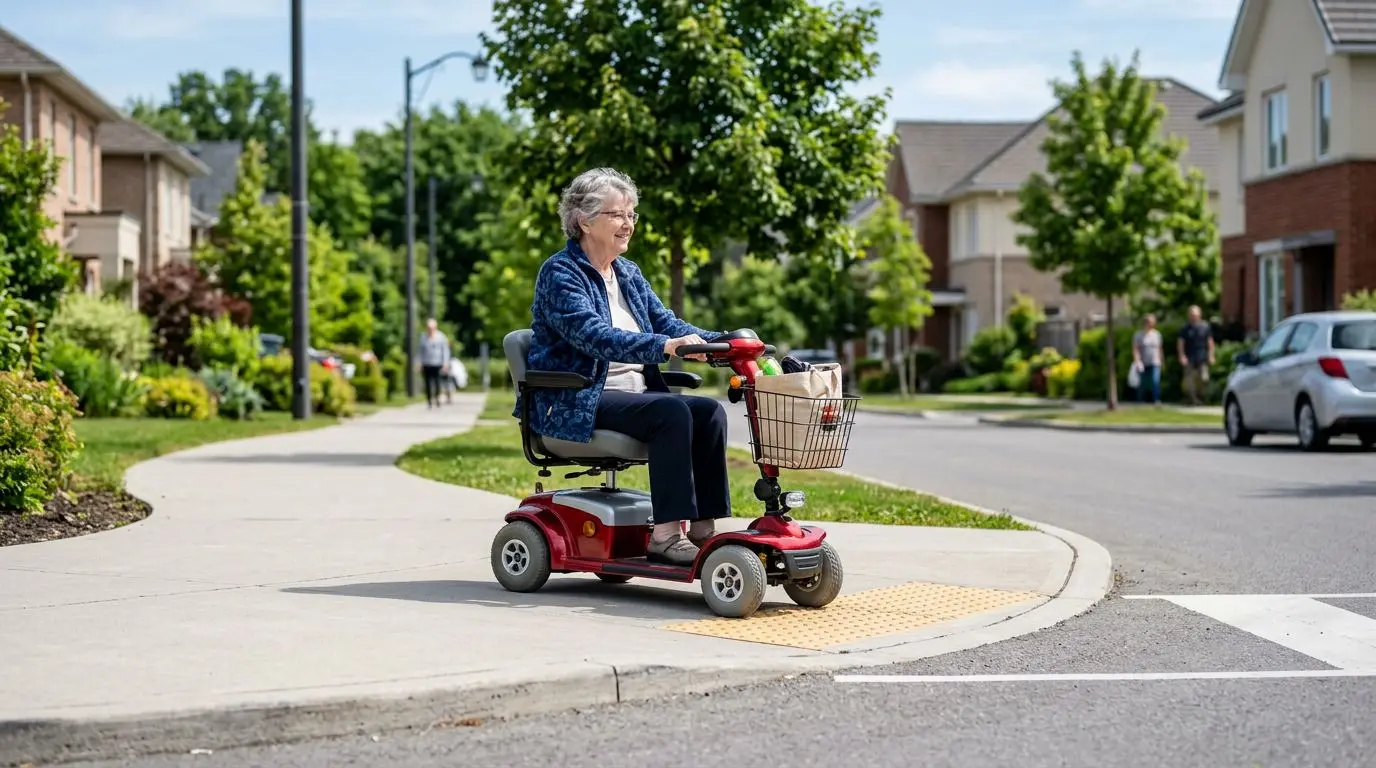
A first-time mobility scooter rider should begin with a simple safety routine: check the scooter, understand the controls, practice in a low-risk area, and work up to daily routes gradually. The safest first ride is not a full errand; it is a 20- to 30-minute practice session on flat, open ground with a caregiver or trusted adult nearby.
Mobility scooters can support independence, but they are still powered vehicles with weight, speed, turning limits, and battery needs. This checklist is for seniors, caregivers, and new adult riders who want a calm, practical onboarding plan before using a scooter at home, in a senior community, on sidewalks, or inside stores.
Start with a 10-minute pre-ride safety check
Before every ride, take 10 minutes to look over the scooter. This short routine helps catch common problems, such as a loose basket, low battery, flat tire, or seat that is not locked into position. New riders should do the checklist out loud for the first week, especially if a caregiver is helping.
- Battery level: Confirm the battery gauge shows enough charge for the trip and return. For a new rider, avoid leaving with less than half a charge.
- Seat position: Make sure the seat is locked, facing forward, and set so both feet rest comfortably on the floorboard.
- Armrests: Check that armrests are secure and not blocking safe steering.
- Tires or wheels: Look for visible damage, low air pressure on pneumatic tires, or debris caught around solid tires.
- Freewheel lever: Confirm the scooter is in drive mode, not freewheel mode, before sitting down and using the throttle.
- Horn and lights: Test the horn. If riding in dim conditions, check front and rear lights.
- Basket and belongings: Keep bags low and secure. Do not hang heavy items from the tiller because they can affect steering.
- Floorboard: Remove loose items, cords, clothing, or oxygen tubing that could interfere with feet or controls.
Caregivers can tape a printed checklist near the charging area or inside a garage. A large-font version, around 16- to 18-point type, is often easier for older eyes to read quickly.
Know the controls before moving more than 5 feet
Most mobility scooters use a tiller for steering, a throttle lever or paddle for forward and reverse, a speed dial, a key or power switch, and an electromagnetic brake that engages when the throttle is released. Before a new rider travels more than 5 feet, they should identify each control and practice using it while stationary.
| Control or feature | What it does | First-time safety tip |
|---|---|---|
| Throttle lever or paddle | Moves the scooter forward or backward | Press gently with one hand and release to stop; avoid squeezing suddenly. |
| Speed dial | Limits top speed | Start at the lowest setting for the first 3 to 5 practice sessions. |
| Key or power switch | Turns power on and off | Turn it off before transferring on or off the seat. |
| Freewheel lever | Allows manual pushing when disengaged | Never ride with freewheel engaged; the brake may not hold normally. |
| Horn | Warns pedestrians or alerts a caregiver | Test it before leaving home, especially in busy buildings. |
| Battery gauge | Shows approximate remaining charge | Treat it as an estimate, not a promise of exact range. |
The key habit is simple: release the throttle to stop. New riders sometimes look for a hand brake like on a bicycle, but many scooters brake automatically when throttle pressure stops. Practice this several times in a safe space before turning, backing up, or approaching a doorway.
Use a 30-minute practice plan in a flat, open area
A first practice session should last about 30 minutes or less. Fatigue can affect reaction time, grip, posture, and judgment, so shorter sessions are better than trying to master everything in one day. A quiet parking lot, empty community room, wide driveway, or smooth sidewalk loop can work well if the surface is level and free of traffic.
Practice sequence for the first session
- Minutes 1 to 5: Sit, adjust posture, turn the scooter on and off, and locate each control.
- Minutes 5 to 10: Move forward 10 to 20 feet, release the throttle, and stop smoothly.
- Minutes 10 to 15: Practice wide left and right turns at the lowest speed setting.
- Minutes 15 to 20: Back up slowly in a straight line while looking behind and to both sides.
- Minutes 20 to 25: Approach a doorway, stop, and realign before passing through.
- Minutes 25 to 30: Park, turn off the scooter, and practice a safe transfer off the seat.
Do not practice on a hill the first day. Do not practice near moving cars. If the rider feels rushed, embarrassed, dizzy, anxious, or unsure, stop the session and return later. Safety improves with repetition, not speed.
Match scooter type to the rider, route, and turning space within 36 inches
Different scooter types handle differently. A compact scooter may fit tighter indoor spaces, while a larger outdoor scooter may feel steadier on longer routes but need more room to turn. Many home doorways are around 30 to 36 inches wide, so measuring real spaces matters more than guessing from a brochure or online listing.
| Scooter type | Common strengths | Watch-outs for new riders | Who it is best for |
|---|---|---|---|
| 3-wheel scooter | Tighter turning and easier indoor maneuvering | Can feel less stable than a 4-wheel design on uneven ground or sharp turns | Riders using hallways, apartments, senior living buildings, or stores |
| 4-wheel scooter | More stable feel on straight paths and outdoor surfaces | Usually needs more turning space | Riders using sidewalks, parks, longer hallways, or mixed indoor-outdoor routes |
| Travel or folding-style scooter | Easier transport and storage | May have smaller wheels, lighter frame, and shorter comfort range | Riders who need occasional use and vehicle transport |
| Heavy-duty style scooter | Higher weight capacity and larger frame | Heavier, wider, and harder to maneuver in tight indoor areas | Riders needing more seating room, capacity, or outdoor durability |
| All-terrain or larger outdoor scooter | Bigger tires and stronger outdoor capability | Not ideal for narrow doorways, small elevators, or crowded stores | Riders with wide routes, rural paths, or long outdoor travel needs |
New riders should not choose based on appearance alone. The safest scooter is the one that fits the person, the home, the route, and the rider’s ability to control speed calmly.
Measure the rider and the route in 5 key places
Good safety planning starts with a tape measure. Measure at least 5 places before daily use: the narrowest doorway, tightest hallway turn, elevator or ramp entrance, storage spot, and vehicle or porch access point. Also measure the rider’s seated reach so the controls are comfortable without leaning forward.
How to measure for safer scooter use
- Doorway width: Measure the clear opening with the door fully open. Include trim, hinges, and threshold edges.
- Hallway turn space: Measure the width of the hall and the space available to swing the front wheels around.
- Ramp slope and width: Check that the ramp is wide enough for the scooter and has edge protection when needed.
- Seat height: The rider should be able to transfer without dropping down or climbing up sharply.
- Reach to controls: Hands should rest comfortably on the tiller with elbows slightly bent.
- Foot placement: Both feet should fit on the platform without toes hanging off or ankles twisting.
Caregivers should watch one transfer from the side and one from the front. Look for signs of unsafe effort: pulling hard on the tiller, twisting while seated, sliding forward on the seat, or needing to stand before the scooter is turned off.
Charge safely and plan trips with a 50% battery cushion
Battery gauges are useful, but they are not perfect. Cold weather, rider weight, hills, stop-and-go travel, tire condition, and battery age can reduce real-world range. For early rides, keep at least a 50% battery cushion and avoid testing the maximum distance.
Set up one consistent charging area. It should be dry, ventilated, away from loose rugs, and close enough to an outlet that no extension cord crosses a walking path. Use the charger intended for the scooter type, and inspect the cord for damage before plugging it in.
- Turn the scooter off before charging.
- Plug the charger into the scooter first if the instructions for that scooter say to do so, then the wall outlet.
- Do not cover the charger with clothing, blankets, or papers.
- Keep pets away from cords.
- Unplug carefully by the plug, not by yanking the cord.
- Ask a technician or qualified provider about battery issues if charging time changes suddenly.
Many riders charge overnight, but charging habits should follow the scooter’s manual and battery type. If the rider uses oxygen equipment, a powered lift, or other medical or mobility devices, cords and charging locations should be planned to avoid clutter and trip hazards.
Ride indoors at walking speed, about 2 to 3 mph
Indoor riding should feel slow and controlled. A practical target is walking speed, often around 2 to 3 mph, especially in hallways, stores, clinics, elevators, dining rooms, and senior living common areas. Faster indoor riding leaves less time to react to walkers, canes, pets, carts, rugs, and sudden doorway traffic.
Use the lowest speed setting inside until turning and stopping feel automatic. Approach doorways straight on. If the scooter is not lined up, stop, reverse slightly, straighten the front wheel, and try again. Avoid scraping door frames because repeated contact can damage walls and may cause the rider to overcorrect.
Indoor safety reminders
- Yield to pedestrians and people using walkers or wheelchairs.
- Slow before blind corners, not during the turn.
- Enter elevators only after people exit.
- Park without blocking hallways, fire doors, ramps, or clinic entrances.
- Watch for thick rugs, raised thresholds, cords, and wet floors.
In stores, keep baskets light and centered. Reaching far to one side while seated can affect balance and steering. If an item is too high or too heavy, ask for help instead of stretching from the scooter.
Handle sidewalks, ramps, and curbs with a 1-inch caution mindset
A small change in surface height can matter. Even a 1-inch lip, broken sidewalk edge, gravel patch, or raised threshold can jolt a scooter and surprise a new rider. When in doubt, slow down, approach straight, and avoid sharp steering over uneven surfaces.
Ramps deserve special care. Go straight up and straight down rather than crossing at an angle. Keep both hands on the tiller, stay seated, and do not stop halfway on a slope unless necessary. If a ramp feels too steep, narrow, wet, or crowded, look for a safer route or ask for assistance.
| Surface or obstacle | Safer approach | Avoid |
|---|---|---|
| Door threshold | Slow, straight, steady throttle | Turning while crossing the lip |
| Sidewalk crack | Cross at a near-right angle when safe | Hitting it diagonally at speed |
| Ramp | Use low speed and a straight path | Sideways travel or sudden stops |
| Gravel or grass | Use only if scooter type and conditions allow | Soft, wet, or uneven ground |
| Curb without a curb cut | Find a curb ramp | Dropping off or climbing a curb |
Most mobility scooters are not designed to hop curbs. A curb cut is the safer choice. New riders should map routes that include smooth crossings, reliable curb ramps, and places to turn around if a path is blocked.
Caregivers can support the first 7 days without taking over
The first 7 days set the rider’s habits. Caregivers should help with observation, route planning, charging routines, and confidence-building, but they should avoid grabbing the tiller unless there is immediate danger. Sudden physical help can startle the rider and make steering worse.
A caregiver’s first-week checklist
- Day 1: Review controls, pre-ride checks, charging setup, and safe transfers.
- Day 2: Practice starting, stopping, turning, and backing up in a quiet area.
- Day 3: Ride one short indoor route, such as bedroom to kitchen or apartment to lobby.
- Day 4: Practice doorways, elevators, and parking without blocking access.
- Day 5: Try a short outdoor route on a smooth, familiar sidewalk.
- Day 6: Review battery use, storage, and what to do if the scooter stops.
- Day 7: Repeat the most common daily route and adjust the checklist if needed.
Caregivers should ask open questions: What felt difficult? Where did you feel rushed? Which turn was too tight? These questions help the rider build judgment instead of depending on someone else to make every decision.
Use a 3-step plan if the scooter stops or feels unsafe
Every new rider should know what to do if the scooter stops, slows suddenly, beeps, or feels hard to control. A 3-step plan is easy to remember: stop safely, make yourself visible, and call for help. Do not keep pressing the throttle if the scooter is not responding normally.
- Stop safely: Release the throttle, keep both hands on the tiller, and stay seated unless the location is unsafe.
- Be visible: Use lights or a horn if needed, and move out of traffic only if the scooter still responds safely.
- Call for help: Contact a caregiver, building staff, roadside assistance option, or emergency services if there is danger or injury.
Carry a charged phone on every ride, even short trips to the mailbox. A small card with emergency contacts, address, medical considerations, and caregiver phone numbers can be kept in the basket or wallet. If the scooter must be pushed manually, make sure the person helping understands the freewheel lever and brake behavior.
A 12-point daily safety checklist for new riders
Use this 12-point checklist before routine trips. It is short enough for daily use but broad enough to catch the most common first-time mistakes.
- Battery shows enough charge for the trip and return.
- Charger is unplugged and stored safely.
- Seat is locked and facing forward.
- Armrests are secure and adjusted.
- Freewheel lever is in drive mode.
- Speed dial is set low before starting.
- Horn works.
- Lights or reflectors are ready if visibility is low.
- Tires or wheels look clear and undamaged.
- Bag, cane, oxygen tubing, or personal items are secured.
- Route is known and has safe curb cuts, ramps, or elevators.
- Phone or emergency contact card is with the rider.
If any item fails, pause before riding. A delayed trip is better than a preventable fall, collision, dead battery, or stressful call for help.
5 FAQs about first-time mobility scooter safety
How fast should a beginner ride a mobility scooter?
A beginner should start at the lowest speed setting and keep indoor riding near walking speed, about 2 to 3 mph. Outdoor speed should increase only after the rider can start, stop, turn, and avoid obstacles calmly.
Should a senior practice alone on the first day?
It is safer to have a caregiver, family member, or trusted adult nearby for the first 1 or 2 practice sessions. The helper should observe, keep the area clear, and assist only when needed.
Can mobility scooters be used in stores?
Many scooters can be used in stores if aisles are wide enough and the rider moves slowly. The rider should yield to pedestrians, avoid overloading the basket, and ask for help with high or heavy items.
Is it safe to ride in rain?
Light moisture may be unavoidable, but wet surfaces increase slipping risk and electrical components should not be soaked. New riders should avoid heavy rain, puddles, wet ramps, and low visibility whenever possible.
What is the biggest first-time mistake?
One of the biggest mistakes is setting the speed too high too soon. Another common issue is forgetting the freewheel lever, which can affect braking and control if it is not in drive mode.
How often should the checklist be used?
Use the full checklist daily for at least the first 2 weeks. After that, many riders keep a shorter version for every ride and do a more detailed inspection weekly.
Frequently asked questions
How fast should a beginner ride a mobility scooter? +
A beginner should start at the lowest speed setting and keep indoor riding near walking speed, about 2 to 3 mph. Speed should increase only after smooth starting, stopping, turning, and backing up feel comfortable.
What should be checked before every scooter ride? +
Check the battery level, seat lock, armrests, tires or wheels, freewheel lever, horn, lights, basket, floorboard, and phone or emergency contact card before riding.
Where should a new rider practice first? +
Start in a flat, open, low-traffic area such as a wide driveway, empty community room, quiet parking lot, or smooth sidewalk loop. Avoid hills, crowds, curbs, and moving cars on the first day.
Can a caregiver push a mobility scooter if it stops? +
Often, yes, but only after the scooter is powered off and the helper understands the freewheel lever and brake behavior. The scooter should be moved slowly and only when the path is safe.
How can riders avoid running out of battery? +
Charge consistently, start early trips with more than half a charge, avoid testing the maximum range, and plan shorter routes until real-world battery use is understood.
Related guides
Mobility Scooter Safety Guide for Seniors: How to Ride, Turn, Stop, and Park With Confidence
15 min read
Pre-Ride Mobility Scooter Safety Checklist: Tires, Battery, Brakes, Lights, and Loose Parts
13 min read
Mobility Scooter Safety at Home: Doorways, Thresholds, Rugs, Tight Turns, and Charging Areas
14 min read